Friday, November 27, 2009

tastes of the season

Whisking

You already know that I made it past Halloween without my double-stuffed, neon orange Oreos. I'm now here to report that I bypassed Thanksgiving without pumpkin pie, pecan pie, or even those little Italian cookies (a Brooklyn favorite) that decorate the after-dinner table each year. I survived Thanksgiving, sugar-free. (Well, almost. I found out later that the mashed turnips had a bit of sugar in them. Live and learn.)

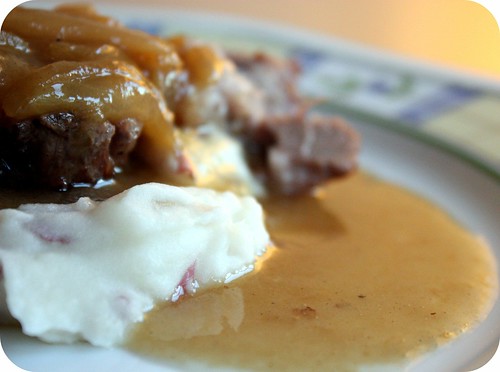
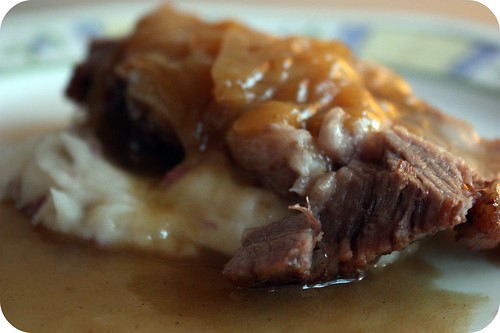
My Thanksgiving this year consisted of apple cider, kissed with the tartness of pomegranate juice and a splash of fizzy water. A two-year old's sniffles when she couldn't find her Christmas tree figurine ("Where my Christmas tree?"). A surprisingly moist and flavorful slice of turkey breast, accompanied by a silken puree of mashed potato. Trying to stay out of the way as eleven other people maneuvered their way into seats around the expanded dining room table. Falling to sleep in a quiet home tucked within New York City, totally content.

I need to tell you that Thanksgiving without sugar blew other Thanksgivings out of the water. This year, instead of anticipating the cloying rush of sweetness at the end of the meal, I savored each bite, noticed the sideways glances around the table as the grandmothers squabbled and the couples squeezed hands. I woke up this morning with more energy than I can usually muster on Post-Turkey Friday, and I gazed out the window at barren branches swaying in the wind. I was happy.

While Thanksgiving was great and all, for me, it's simply the Christmas season's gatekeeper. I'm sure my contentment this morning is due in no small part to the fact that I can now admit that I'm listening to Christmas carols without shame, don some red sweaters, dash to the nearest holiday office party, and start consuming things that contain peppermint.

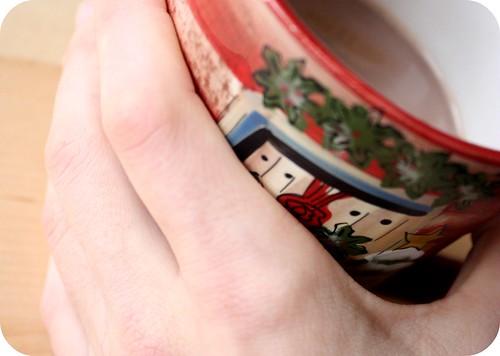
While I'm perfectly content with passing up Halloween candy and pumpkin pie, I will not be deterred from the familiar tastes of the holiday season. Thus my proudest achievement of the year so far, my refined sugar-free peppermint hot chocolate. Tasting this for the first time a few nights ago, I sighed in contentment. This is everything I always loved about the holiday drinks at Starbucks, and I don't even have to waste a paper cup to get it. Even better, I can drink it in the evening without experiencing what I now call a "sugar hangover" the next morning. Sipping my proud creation as I write, I'm convinced there is no more perfect way to spend a morning and kick off a season.

-Kylie

P.S. Big news! Remember how we were giving away a book way back when it was Thin Crust Deep Dish's birthday? Well, our very lucky winner (selected scientifically from a baking dish of names) was Caitlin of Roost. Congratulations to you! We can't wait to find out which book you'll chose. And thanks to all who participated and showed your love here. It was a blast to hear from you, and we appreciate your kind words of encouragement more than you know.

Peppermint Hot Chocolate
Serves 2


2 cups whole milk
4 Tbs. unsweetened cocoa powder (I like Ghirardelli)
1/2 tsp. peppermint extract
1 Tbs. raw honey
6 drops liquid Stevia (or less, depending on your taste)

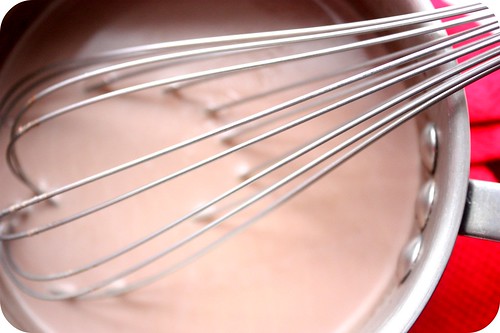
Warm milk over low heat in a small pan. In a mug, combine cocoa powder, peppermint extract and honey. Once the milk has warmed, pour about two tablespoons of it into the cocoa mix. Stir briskly with a fork until the mixture becomes a smooth paste. Pour mixture into pan of milk and whisk until it incorporates fully. Taste the hot chocolate with a small spoon. If it isn't sweet enough for your taste, add Stevia one drop at a time, whisking and tasting as you go. Once the sweetness is to your liking, continue to heat hot chocolate until it is hot but not boiling. Pour into mugs to serve.

To make a peppermint mocha, simply pull a shot of espresso into the bottom of the mugs before serving. To make an alcoholic hot chocolate, replace the peppermint extract with a shot of peppermint schnapps.

Peppermint Hot Chocolate

Monday, November 23, 2009

The Brooklyn Chocolate Experiment

Mary and Her Ice Cream

Something is happening with food these days. Half of my coworkers tell me that cooking is one of their favorite hobbies. Food blogs are proliferating at a rate of thousands each day. More people than ever before are visiting farmers' markets. People are becoming interested and invested in food. And not just in food for sustenance. Food for fun.

Brooklyn Chocolate Experiment

Last weekend, I had the opportunity to participate in a revelatory yet revolutionary food event: The Brooklyn Chocolate Experiment. This was the most recent of the Food Experiments, presented by culinary duo Nick Suarez and Theo Peck, which have included the Brooklyn Beer Experiment and the Brooklyn Cheese Experiment. Together, Suarez and Peck have racked up their own impressive collection of cook-off accolades, though the Food Experiments are parties that they host for other worthy culinary competitors. Each event features one ingredient, and competitors create a sweet or savory dish to showcase that prize ingredient.

Flurry of Chocolate

Last Sunday, thirty or so competitors created 300 bite-sized samples of their dish, and 300 hungry New Yorkers then filed excitedly into the Bell House, a concert venue in Brooklyn. Tickets were sold out online before the doors even opened, and the lucky ticket holders were hungrily idling down the block in anticipation of the competition. We filed inside to load our plates with culinary delights including a succulently tender lamb slider with harissa chocolate sauce, a dense and creamy chocolate cheesecake made with stilton, and even the "After-School Special", consisting of a mini chocolate chip cookie served alongside warm vanilla-infused milk.

Chocolate Cornflake Hush Puppies

We enjoyed the many competing dishes thoroughly, but our favorite by far was Roopa Marcello's perfectly balanced Thai Chocolate Ice Cream. She used a melon baller to scoop the rich, slightly spicy custard into a delicate chocolate ginger cone. She then topped the creation with crushed peanuts. I was truly impressed with the balance of flavors and textures in the dessert.

Chocolate Experiment Ballot Box

Tickets to the event included a glass of Brooklyn Brewery's famous Chocolate Stout, which everyone is telling me is even better this year than last. And while I had to leave the event early, the after-party included additional chocolate samples for those who weren't already chocolated out. The day was memorable, fun and whimsical, and I can't wait to buy my tickets for the next one. Events like the Brooklyn Chocolate Experiment handily remind me that people do care about food and that it can make us happier, one cook-off at a time.

-Kylie

Kylie and Ellen, Full of Chocolate

Friday, November 20, 2009

Scary Dangles


I've finally stopped to ask myself one very important question:  When did I become afraid of scary dangles?

When I was 3 years old, my living room housed a small, plastic jungle gym.  Bright red tubes made up the frame, with large plastic squares snapping into place to create walls and floors.  Perhaps you remember the type I'm talking about?  I loved that jungle gym, as only a 3 year old with an insatiable thirst for adventure could.  Oh yes, it offered endless possibilities for danger and excitement.  But the best game of all, the one that I returned to day after day, I had aptly named "Scary Dangles."

Scary dangles was simple enough in premise, yet never ceased to entertain me (and my parents, who I'm sure were tickled pink by their daughter's bizarre pastimes).  Here's how it worked:  1) Climb to the top of the jungle gym frame.  2) Hook an arm, leg, what-have-you (this is where you get points for creativity) over the top-most bar.  3)  Swing free, and dangle midair in the most precarious and "scary" way possible.  

Before anyone calls child protective services, please note that my scary dangles took place all of 10 inches above the pillow-covered ground.  But to Adriana the 3 year old, a scary dangle was the epitome of laughing in the face of danger.  Each dangle was unique.  And with each dangle I showed the world just how tough I was.

Now, here I am at 24, spending day after day sitting in my barren cubicle, reworking spreadsheets, and listening to my boss tell me once again that I'm not getting enough done (in other words, working at a 'stable' office job.)  Yet, I spend my nights in another world, in another life, attending culinary school and loving each and every moment.  Somewhere along the way I convinced myself that an office job was the only reliable way to make a living.  I persuaded myself to think that I could never seriously pursue cooking or writing as a career.  I pressured myself into believing that my office job was as much as I deserved and as much as I was capable of.

And now that I think about it, I cannot, for the life of me, remember the last time I took a scary dangle, threw my head back, and laughed in the face of precaution.  Well, I think it's about time, don't you?

Today I handed a letter of resignation to my boss, and then I went to school and churned out some flaky, buttery biscuits, ornamental, chocolate-dipped tea cookies, and three nearly excellent baguettes.

I don't yet know what will come next for me.  But you can rest assured that I'll be here to cook and write my way through finding out.  And for some reason I'm not worried.  Because suddenly I'm 3 years old again, grasping that tip top bar, closing my eyes, and swinging free.


Drunken Raisin Brioche Cinnamon Buns

These are perhaps the most indulgent cinnamon buns I have ever had the pleasure of barbarically wolfing down.  I've altered the recipe slightly from the version I made in class so that it's more friendly to the home cook.  If you're about to take on a challenge these buns will give you the courage to do it.

Ingredients

basic brioche dough
4 oz brown sugar
2 oz butter, cold pieces
1 tablespoon cinnamon
1 cup raisins

1 cup brandy

apricot jelly

2 cups powdered sugar

milk

step one:  One day ahead, pour brandy over the raisins and store overnight until the raisins have absorbed most of the brandy.


step two:  Make your basic brioche dough.


step three:  Mix the brown sugar and cinnamon together.  Use your fingers to cut the butter into the mixture until only pea-sized chunks are left.

step four:  When the brioche dough has risen, roll out a large rectangle of it (about 20 in x 15 in) on a floured surface.  If you're having trouble rolling it out, do the best you can, let it rest for a few minutes so that the dough can relax, and then finish shaping it.


step five:  Sprinkle the cinnamon sugar mixture all over the top of the rectangle and all the way to the sides, except leave a 1in boarder on the top long side for sealing.  Squeeze the excess brandy out of the raisins, and sprinkle those liberally over the sugar mixture.  Use fingers to lightly press down filling.  Dip your fingers in water and slightly wet the top board to help with sealing.

step six:  starting with the bottom long side, carefully roll up the rectangle, being sure to keep your roll tight and even.  Pinch closed the seam and roll lightly to make the shape more uniform.  Trim off the ends, and slice into 1.5 in thick pieces.  Set in a buttered dish, giving them enough space in between to expand.  Set aside until they rise a bit, but not quite double in size.

step seven:  Cook in the oven at 400F until they are done to your liking.  Each oven is different, so I can't give you an exact time.  I find it best to slightly under-bake these beauties, and I suggest you do the same to keep them moist and gooey.

step eight:  Meanwhile, set apricot jelly in a pot on the stove over very low heat to melt.  Add a tiny bit of milk to your powdered sugar and mix until you get the consistency of a glaze, thicker or thinner depending on your preferences.  When the buns come out of the oven, brush immediately with apricot jelly.  Let cool, and then drizzle with sugar glaze.


Enjoy with a glass of milk, and your next big adventure.

-Adriana

Saturday, November 14, 2009

the hardest part is the beginning

One Pumpkin Whoopie Pie

I've been lazing around the house all day now, since I woke up. I've wanted to start this blog post, but instead I've been doing things to put it off. Things I've done today while procrastinating blog posting include:

1. Looking through four different cookbooks in search of fun things to do with the last of the carrots in our crisper
2. Making a list of everyone I want to give holiday gifts to, and planning what those gifts will be
3. Checking Twitter on five different occasions
4. Looking up dessert restaurants that are open late in Brooklyn for a friend's birthday
5. Making chicken stock from this week's roast chicken bones
6. Doing the dishes in the sink

While each of these fantastic procrastination devices has been somewhat productive (with the possible exception of the obsessive Twitter checking), what I really wanted to do was write. But as lots of people who write know, beginning is usually the most difficult part. My thought process during today's procrastination went something like this:

"I'd really like to write a blog post today. But what could I write about? I need to cook something to write about it. I mean, it's a food blog, after all. I can't just sit down and write things and then publish them to the internet. Yes, I should cook something. But what should I cook? We're nearly out of butter, and everything I would want to cook includes butter. I should go to the store to get some butter. But I don't really want to go to the conventional grocery store to get it. I don't know where that butter's been or what kind of a cow it came from. I could go to the farmers' market and get some cream to make my own butter. But then I have to go out in the rain, and it's going to take forever to walk to the farmers' market and back. I could make carrots, I guess. Carrots would be a good thing to make. Plus, people will be looking for things to make for Thanksgiving, and it would be nice to give them an idea for a side dish. But we have so many roasted vegetables in the fridge. I can't just make more carrots. They might go bad, and that would be such a waste. Maybe I could make a carrot soup. That would keep in the freezer. But I don't have any stock. I'd better start making stock with that chicken carcass I have from the other night. Now I'm hungry. I think I'll heat up some leftover roast chicken and vegetables with rice for lunch. I should probably do the dishes, too. This stock is going to take a long time, and it's getting dark now. There's no way I'm going to be able to make stock for a soup, make a soup, and photograph it for the blog today. I guess I should just start writing. I could post those awesome pumpkin whoopie pies from the Baked cookbook that Mary made a few weeks ago. But that's a sweet, and Adriana's probably going to be posting a lot of sweets since she just started her baking and pastry unit in school. But I guess it would be fine to post the whoopie pies because they're really terrific, and some people might want to make them for Thanksgiving. Yeah, I guess I could post about them. But what the heck am I going to write? I should just sit down and get started, and then if I don't like what I'm writing, I can always stop. There's no rule that says you have to finish a blog post the same day you start it. Okay, I'm just going to get started. Now what the heck should I write?"

Yes, folks, that's pretty much what it was like to be in my head today. Quite the jumble of thoughts, eh? To be honest, I don't have much else to say. These pumpkin whoopie pies are incredible. Mary made them, and they looked and smelled so terrific that I decided to eat a whole one, even though I'm going sugar- and white flour-free these days. They tasted to me like little hand-sized pumpkin pies. In fact, they tasted way better than pumpkin pie, in my opinion. Since she made them, I've been telling Mary that she's got to make these as a treat for Thanksgiving. I think you might want to do that, as well.

On an unrelated note, I currently have a Thanksgiving article up at Refrigerator Soup. Have you heard of the site yet? It's similar in some ways to Foodgawker and Tastespotting, except it's a bit more blogger-focused. Each day, the website features a few photos that are posted in a featured section above the fold of the page. This is a terrific chance for food bloggers to showcase their work and draw attention to unique dishes. Refrigerator Soup is also unique because they have a blogroll of all their contributors down the entire right side of the page. This means that as long as you contribute photos to their site regularly, the name of your blog will be on the front page for other food lovers to find. They're a relatively young site, as well, so it's a fantastic place to learn about smaller-scale bloggers who aren't featured as often on larger round-up sites. My favorite thing about them so far, though, is that the people behind the site are just as nice as can be. They genuinely care about bloggers and about providing compelling content. I highly recommend visiting them and submitting your photos if you have a food blog you would like to share.

Pumpkin Whoopie Pies

Pumpkin Whoopie Pies
Adapted from Baked: New Frontiers in Baking
Makes about 24 pies


For the pumpkin whoopie cookies:
3 cups all-purpose flour
1 tsp. salt
1 tsp. baking powder
1 tsp. baking soda
2 Tbs. cinnamon
1 Tbs. ginger
1 Tbs. cloves
2 cups firmly packed dark brown sugar
1 cup vegetable oil
3 cups chilled pumpkin puree
2 large eggs
1 tsp. vanilla extract

For the cream cheese filling:
3 cups confectioners' sugar
1/2 cup (1 stick) unsalted butter, softened
8 oz. cream cheese, softened
1 tsp. pure vanilla extract

Cookies:
Preheat the oven to 350 degrees Fahrenheit. Line two baking sheets with parchment paper or nonstick baking mats.

In a large bowl, whisk the flour, salt, baking powder, baking soda, cinnamon, ginger and cloves together and set aside.

In a separate bowl, whisk the brown sugar and oil together until combined. Add the pumpkin puree and whisk to combine thoroughly. Add the eggs and vanilla and whisk until combined.

Sprinkle the flour mixture over the pumpkin mixture and whisk until completely combined. Chill completely (at least one hour). This will make the pies easier to scoop and will give them their signature domed top.

Use a tablespoon to drop heaped spoonfuls of the dough onto the prepared baking sheets, about 1 inch apart. Bake for 10 to 12 minutes, until the cookies are just starting to crack on top and a toothpick inserted in the center of a cookie comes out clean. Remove from the oven and let the cookies cool completely on the pan while you make the filling.

Cream cheese filling:
Sift the confectioners' sugar into a medium bowl and set aside.

In the bowl of an electric mixer fitted with the paddle attachment, beat the butter until it is completely smooth, with no visible lumps. Add the cream cheese and beat until combined.

Add the confectioners' sugar and vanilla and beat until smooth. Be careful not to overbeat the filling, or it will lose structure. (The filling can be made 1 day ahead. Cover the bowl tightly and put it in the refrigerator. Let the filling soften at room temperature before using.)

Assemble the whoopie pies:
Turn half of the cookies upside down (flat side facing up).

Use a tablespoon to drop a large dollop of filling onto the flat side of the cookie. Place another cookies, flat side down, on top of the filling. Press down slightly so that the filling spreads to the edges of the cookies. Repeat until all the cookies are used. Put the whoopie pies in the refrigerator for about 30 minutes to firm up before serving.

The whoopie pies will keep for up to 3 days, on a parchment-lined baking sheet covered with plastic wrap, in the refrigerator.

-Kylie

Pumpkin Whoopie Pies

Thursday, November 12, 2009

Mr. Nice Guy


Ever had one of those days where the whole world seems to be picking on you?  I'm sure you have.  Don't worry, I'm not about to spend the next three paragraphs griping about my day.  After all, I'm pretty sure you've stopped by to learn about how to make some seriously scrumptious macaroons (we'll get there!), and are somewhat less interested in my two (totally bogus) parking tickets, my farcically unpleasant boss, and the fact that it's been days since I saw my man-slice, now that he's shifted to a nocturnal work schedule at the hospital.  No, no, I've gotten all that griping out of my system by now (thanks, Mom!)

Instead, I'd like to tell you about something nice.  Or rather, someone nice.  This past Monday I started a brand new unit at culinary school:  Baking and Pastry.  Wooooo!  Sorry, the excitement still hasn't worn off.  And with the brand new unit came a brand new instructor.  And...and...wait for it...he's NICE!  Really nice!  Honestly, actually nice! 

On day one, I thought it might be an act.  You know, buttering us all up (no pun intended) before shifting gears into No-More-Mr.-Nice-Guy the minute we reached the unit on pie.  On day two, I wondered if his elated mood might be a by-product of the copious amounts of sugar dust floating through the air.  On day three, I finally had him figured out.  Ladies and Gentlemen, I present to you...a genuinely nice guy.  The strange thing about his niceness is that it seems to be infectious.  Cliques of students who previously didn't say much to one another are sharing tips, compliments, and banter.  People are pitching in to clean up like never before.  In three short days, the entire chemistry of our class seems to have shifted.

I was so drawn in by his nice-ness that I even forgot to ruin my egg whites this evening, and was flabbergasted to find myself holding a platter of semi-respectable macaroons at the end of class.  If you recall my first 5 attempts at beating egg whites into something pretty (click here, and here), you'll understand just why I was so surprised. 


So, friends, I do hate to end a post with something trite, but it's late, I'm sleep deprived, and cliches are starting to look as inviting as my fluffy down comforter.  Perhaps I'll simply say that having the person in charge be nice, is a gosh darn nice change of pace.

Almond Macaroons


Ingredients
4 oz. egg whites (from 4 eggs)
11 teaspoons sugar
2 teaspoons vanilla
4 oz. almond flour
8 oz. confectioner's sugar

Step one:  Whisk egg whites until they reach the soft peak stage.  Gradually add the granulated sugar during this process, being careful only to sprinkle in a bit at a time.

Step two:  Sift almond flour and confectioner's sugar together.  Add vanilla and half the dry mixture to the whipped egg whites and gently fold in with a spatula.  Mix in the remaining dry ingredients the same way, being careful not to deflate the egg whites.

Step three:  Fill a pastry bag with a round tip, and pipe out cookies about the size of a half-dollar coin.  It helps to hold the pastry bag at a 45 degree angle so that you don't get a little nub on top of each cookie.

Step four:  Let cookies rest at room temp for about 10 minutes, then bake at 325 F until set.  The length of time will depend on the size of your cookies and the temp of your oven, so just keep watch on them and you'll be fine.

Step five:  Allow cookies to cool completely.  Pipe a small amount of fruit jam (I used raspberry) onto one cookie, and sandwich it with a cookie of similar size.

If you're feeling extra nice, make some extra and share them around!
-Adriana

Monday, November 9, 2009

Gingered Applesauce


I've always found great comfort in food that can be eaten with nothing but a bowl and spoon. Maybe it's because I can cradle the bowl in my arm, almost like getting a hug from your snack. Maybe it's because, unlike forks and knifes, there's nothing sharp or pointy or potentially dangerous about a spoon. Or maybe it's because the food served in bowls with spoons is often warm and mushy, i.e. the perfect antidote to my more jagged days.

Yes, I've found myself reaching for bowls and spoons more often than I might like to admit. Once, after a particularly bad break up, I managed to eat an entire bag of tollhouse semi-sweet chocolate chips via the bowl and spoon method. Yes, it's true. And no, I'm not proud.


So, this afternoon when I was craving a bit of pre-week comfort, I turned to the last basket of apples left over from my apple-picking extravaganza in September. While the apples were just a wee bit past the crispier, crunchier phase of their lives, they were still perfect for apple sauce.

As far as comfort food goes, applesauce is where it’s at. I promise. It’s warm and mushy and sweet and fragrant. It’s easy to make and done within an hour. It leaves you feeling nourished and happy. And, of course, it is best eaten with your favorite bowl and spoon.

At the last minute, I decided to grate in a bit of fresh ginger and add a squeeze of lemon, two of my all time favorite flavors. Though I imagine some cinnamon, nutmeg and cloves would have also been warm and delicious. Or perhaps I could have sliced in a couple of pears and added 2 or 3 cardamom pods. My goodness, homemade applesauce is quite a versatile comfort food.


So, as your days get colder and darker and more hectic, I hope you remember my scientifically proven bowl and spoon method of relaxation. Whether you fill your bowl with my scrumptious gingered applesauce, a homemade stew, mashed potatoes, or chocolate chips, it is guaranteed to bring you a few moments of comfort.


Gingered Applesauce
Ingredients
10 medium apples
2 teaspoons freshly grated ginger
Salt

1. Slice each apple into quarters and remove the core. You may peel the apples if you dislike the peels or if you don’t have a food processor.
2. Add apples to a heavy bottomed pan such as a Dutch oven. Add ½ in. water, grated ginger and a pinch of salt, cover and bring to a boil.
3. When water is boiling, remove the lid and let apples cook, stirring occasionally, until they reach the desired consistency, about 30 min.
4. Feel free to add honey or brown sugar if you feel your applesauce lacks enough sweetness, but be sure to taste it first because it is unlikely to need it.
5. Puree if desired (I didn’t), and enjoy warm in your favorite bowl with your favorite spoon.

-Adriana

Wednesday, November 4, 2009

learning curve

Braised Pork

The title of this blog, or at least the title of the half of the posts that I write, should probably be called If I Can Do It, So Can You. I sometimes feel inept in the kitchen, especially when trying to improvise. Each time I end up with a perfectly done, balanced and beautiful dish, it seems something of a miracle that it emerged from beneath my hands. This is especially true with meat. When I say meat, I mean the flesh of all living things. Red meat, chicken, pork, and fish. Oh, fish; especially you. You name it, I've destroyed it with a wayward recipe interpretation or extra flick of the spice jar.

When Mary and I first started dating, I tried to impress her with my culinary prowess. I had never had a girlfriend before, and I was convinced I was going to do it right, the whole having a girlfriend thing. I was going to be a gourmet lesbian. Mary told me her favorite food was pork, so I searched for the easiest pork recipe I could find. That recipe included a couple of pork chops from a Manhattan grocery store, a packet of dehydrated onion soup mix, and . . . (wait for it) . . . apple sauce. You think I'm kidding? I'm not. After  a few choked-down bites, it was clear that Mary was in it for more than my nonexistent pork-cooking skills. We scrapped the rest of that meal, and I didn't make pork again for a few years.

Braised Pork

Another unfortunate meat incident received the very appropriate label of "Cinna-beef". I had purchased some grass-fed ground beef from the co-op, so things were looking good when it all began. We set out to make our trusty standby of ground beef tacos, tried and true. Unfortunately, fate intervened. I had read an interview with Rick Bayless of recent Top Chef Masters fame, in which Chef Bayless pronounced that the addition of cinnamon made Mexican cuisine unique. That night, after I added the spices to the beef, it was still lacking flavor. We had run out of chile powder. And so I thought immediately of the Vietnamese cinnamon we had recently purchased on a trip to Seattle. And Rick Bayless. And I sprinkled that cinnamon in, effectively ruining what could have been a week's worth of delicious taco lunches. The unfortunate part of all of this was that I knew how nutritious (and expensive) this beef was. I still ate it (cinnamon flavor and all) for lunch each day that week. We still haven't had tacos since then. Mary feels we need to put some distance between the Cinna-beef incident and subsequent taco creations, and I can't help but agree.

Then there was that time when I bought the cheapest fish at the farmers' market. To be honest, I don't remember what it was called. I just remember that it took all my might to eat half of it. From that experience I learned not to buy the cheapest fish at the farmers' market. There's probably a reason it's the cheapest.

In between all these culinary learning opportunities, there have been some wild successes. The good thing is that successes seem to happen in direct proportion to the supposed failures. I try to remind myself whenever I feel like a total hack that the kitchen disasters are what make the successes possible. They also make you feel great when you make something you actually consider palatable, like I did the other day. What makes that success even better? When your girlfriend loves it, and you can finally say you successfully made pork that was delicious.

With all this in mind, I'd like to reiterate: If I can do it, so can you. Go forth and try to braise some pork shoulder the next time you have a few hours to spend near the kitchen.

Braised Pork Shoulder

On a surprisingly related note, remember last week when we invited you to comment on our post to win one of three books, and then the comments didn't work? Yeah, I remember that, too. Comments are actually fixed now, for real. This technology thing can be a bit like meat, and sometimes you need practice to get it right. We'd like to invite you again to comment here. We'll then pick someone randomly to receive a copy of Fat, Ratio or Super Natural Cooking.

Now. What's today's motto? "If I can do it, so can you." That's right, kids.

-Kylie
 

Subscribe in a reader

Adriana Willsie and Kylie Springman ©2009