Saturday, January 31, 2009

greens and all

Lately, I've been all about reusing instead of throwing things in the trash. I still haven't figured out a good system for composting in our new apartment, so I'll admit I'm doing nowhere near as well at reducing waste as I'd like. However, I've been doing alright in other areas. Instead of buying new wrapping paper, I've been saving old papers and scraps to decorate and create new works of art and handmade wrapping paper. And I've been thoroughly inspired by websites like Design*Sponge (particularly their before & after section) to look at refuse in a new way instead of rushing to the store to buy each item I need. 
Today, after a nice morning workout, I planned to find a hardware store somewhere near the gym. We've had some potential home accessories sitting around the apartment for a while that I felt could be freshened up by a new coat of paint, and today seemed like as good a day as any to muster up the courage to figure out how to: a) buy paint, b) sand off old, peeling paint, and c) correctly refinish some furniture. Somehow the below-freezing weather didn't deter me, even though I was still wearing my capri gym pants. I'm really silly sometimes. 

I found out that there was a Lowe's just a few blocks from the gym, and I jauntily departed. I left brownstone-covered Park Slope and started to feel small among the industrial buildings. Below the train tracks at the Smith and 9th Street F stop, on a sidewalk frozen over and slippery enough to skate on, I spotted a few chairs and a broken mirror. Sitting in the middle of the sidewalk. Ready to be thrown out. I walked past, partly because my calves were getting numb and partly because I was afraid somebody would see me eyeing that old furniture and shoo me away. 
I finally made it past lines of sanitation trucks and into the compound of the hardware store. I decided on paint colors, successfully purchased them, and left armed with some extra courage (could it be that the hardware store infused me with some sort of butch bravado while I waited for my paint to mix? Doubtful). Regardless, I made my way, again, below the train tracks, skidded across the icy concrete, and poked with a numb finger at the bottom of a battered old chair. It looked like it had been broken in an Italian restaurant, perhaps cracking atop a mobster's head. I swooped it up beneath my arm and dashed for the train. 

It was exhilarating. While I really knew nobody cared if I wanted to go home with a broken, ugly bottom-half-of-a-chair, I felt positively brazen. I finally made it home with my haul, and Mary's eyes widened a bit, like, "Oh, god, what is she bringing home now?" My mischievous grin must have won her over, though, as that half a chair is now sitting against the living room wall, waiting to become something fantastic once again. 

. . .

One of the things I like most about this recipe from Bon Appetit's February issue is the fact that it uses the whole beet, greens and all. It's meant to be made with golden beets, but I used the red ones because that was what the Coop had, and I honestly like the sweetness of red beets better anyway. If you use red beets, your whole dish will turn red, including the pasta. Personally, I like that. I think we can all use some more color in our lives, or a fresh coat of paint.
-Kylie

Sunday, January 25, 2009

super-duper cheaters' biscuits


When stocking a new kitchen, it takes a while to get to the point where one has all the ingredients and tools she might need. This is especially true when the person in question desires to cook for both pleasure and health. It's tough to balance these two priorities, especially when one lives in Brooklyn and shops at a store that's quite a walk away. Long story short, I bought whole wheat flour and have been using it every weekend in breakfast baked goods instead of mixing it with all purpose. The subsequent pancakes were alright when fortified with crunchy walnuts and fresh slices of fruit, but they weren't as fluffy as I would have liked. 

And then, this morning, there were the biscuits. I baked them from a recipe in Sally Fallon's Nourishing Traditions. Sally suggests using either spelt, kamut, or whole wheat flour. Since all I had was whole wheat, I went with that. After soaking the flour in buttermilk overnight (in order to make the nutrients in the grain more readily available for digestion), I kneaded the dough and added the other ingredients. It quickly became apparent to me that these biscuits didn't have much hope of becoming delicious and/or fluffy as I had hoped the night before. But I'd already begun, and I wasn't about to stop now. I cut out the biscuits, plopped them onto a cookie sheet, and pulled them out of the oven 40 minutes later.

The results looked pretty good (please see photo above). I probably could have lied to you and told you that they were tender, buttery, and scrumptious. But they really weren't, and I'd like to save you from making this same mistake. The biscuits were hard. Like, you drop them on your plate and they make a loud ringing noise. And bitter. I only ate half of one, which if you know me at all, you will know is very, very abnormal. And so, despite the fact that Ms. Fallon names biscuits that substitute 1/3 of the flour with white flour "Cheaters' Biscuits", that's just what I'm going to do next time. In fact, I'm seriously considering using 2/3 white flour and only 1/3 whole wheat, thus making them into Super Duper Cheaters' Biscuits (I made that up myself). So there. I think the results will be wonderful, because the whole wheat versions rose nicely and browned perfectly, even though I later confused them with hockey pucks. 

I'll let you know how my cheaters' version goes. And let me know how you like to make use of whole wheat flours, as well as others like spelt, kamut, and oat. As far as flours go, I've got a lot to learn.

Super-Duper Cheaters' Biscuits
Adapted from Sally Fallon's Nourishing Traditions

Makes about 1 dozen

2 1/2 cups unbleached all purpose flour
1 cup whole wheat flour
1 cup buttermilk
4 tablespoons melted butter or lard
1 1/2 tablespoons sea salt
2 teaspoons baking soda
a little extra flour, for rolling

Mix flours with buttermilk to form a thick dough. Cover with a cloth and leave in a warm place for 12 to 24 hours. 

Place in food processor and process several minutes to knead (or knead by hand for a nice workout). Blend in remaining ingredients. 

Remove dough to a well-floured pastry board and sprinkle with flour to prevent sticking. Roll or press dough to about 3/4 inch thickness. Cut biscuits with a glass or cookie cutter and place on a buttered baking sheet. Bake at 350 degrees for about 30 minutes, or until tops are golden. Serve with butter, honey, preserves, or nut butter. 

-Kylie

Saturday, January 24, 2009

candied citrus peel

Tish Boyle's The Good Cookie is one of those baking books that gives you recipes that are nearly fail-proof. A masterful and creative baker, Tish presents even her most complicated cookie recipes in a step-by-step format. I've used The Good Cookie more than any other cookbook I own, and I've dispersed its tips to many friends. I'm sure I'll share with you a cookie from its pages soon, but for now, I want to tell you how simple it is to candy citrus peels.

This short how-to comes from the candied lemon peel garnish on Tish's Glazed Lemon-Poppy Seed Hearts. This winter, I've been savoring lemons and grapefruits, and it makes me sad to throw away their jewel-colored outer layers. I resolved to make edible gifts from what otherwise would have gone to waste. I've candied lemon and grapefruit peels, but I would highly recommend that you experiment with whatever you have. It only takes a few minutes, so you really have little to lose.

Candied Citrus Peels
Adapted from Tish Boyle's The Good Cookie

1 lemon, lime, grapefruit, or other citrus fruit
1 cup granulated sugar, divided
1/3 cup water

Peel the outer layer of fruit from top to bottom using a vegetable peeler. Slice the resulting strips into shorter or thinner strips, depending on your preference, then set aside.

Place 1/3 cup of the sugar in a small bowl.

Combine the water and the remaining 2/3 cup sugar in a small saucepan and bring to a boil, stirring to dissolve the sugar. Add the peel and boil for 3 minutes.* 

Remove the peel with a slotted spoon and toss with the reserved sugar until coated. Transfer the peel to a plate to dry (this usually takes about 30 minutes). 

Use your candied peel as a garnish to cookies, or chop it up and add it to quick breads, oatmeal, or porridge. Or you could be like me and package it as a small thank-you gift for your culinarily inclined friends.
-Kylie
*I found that the grapefruit peels were still slightly bitter for my taste. To remedy this, strain out your boiled peels and repeat the boiling process one or two more times with fresh water and sugar. This will create a much less bitter finished product.

Thursday, January 22, 2009

If at first you don't succeed, try, try, try, try again

If I may, I'd like to tell you about my most recent cooking adventure via haiku.

1.
egg whites in the bowl
mixer on high but no froth
no meringues tonight

2.
once again I try
phone mother for help this time
flat meringues again

3.
attempt three with friend
mix mix mix but no meringue
sadness in two hearts

4.
determined this time
measure twice and beat on high
blissful fluff reward

Please forgive me for waxing poetic, but my meringue-based trials and tribulations have shaken me to the core. Never has a single dish foiled me three times before finally revealing its secrets. In fact, the pursuit of the perfect meringue has awoken in me a tenacity I haven't experienced since I was 10 and committed to learning how to ride my bike with no hands.

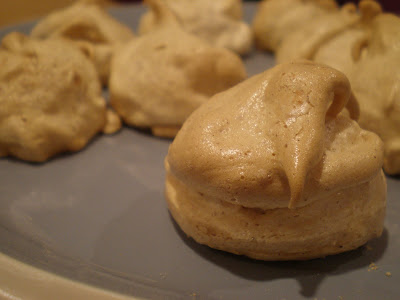
After three wildly unsuccessful attempts at making meringues (see attempt #2 here), this simple cookie had come to represent in my mind all that was unattainable in the world. Tantalus had his low-hanging fruit, Cubs fans had their World Series, and I had my meringues.

But don't worry, this story does have a happy ending. Last night, armed with nothing but a deflated kitchen-ego and a wild-eyed sense of purpose, I tried making meringues for the forth time. I've never followed a recipe so meticulously before in my life. And 2 hours later, I was holding my first batch of freshly baked, albeit slightly overcooked, meringue cookies.

If you want to learn from my mistakes, please feel free to glance at the recipe below. After three unsuccessful attempts, I now have a pretty good sense of what seemingly insignificant missteps will unquestionably thwart you, as they did me, in your pursuit of the perfect meringue.

If at first you don't succeed,
"Chai, Chai Again Meringues"


Ingredients
3/4 cup powdered sugar
1 teaspoon cinnamon
1/2 teaspoon cloves
1 teaspoon ground ginger
2 teaspoon cornstarch
4 egg whites
1/2 cup granulated sugar
1/4 teaspoon cream of tartar
pinch of salt
1 teaspoon rice vinegar

Step one. Preheat oven to 300 degrees and line 2 baking sheets with parchment paper.

Step two. Sift together powdered sugar, cinnamon, cloves, ginger and cornstarch and set aside.

Step three. In a double boiler or a metal bowl set over a pot of hot water, whisk together egg whites and granulated sugar until mixture is warm and sugar has dissolved. BE CAREFUL not to let the slightest bit of fat get into the mixture. As I learned the hard way, a smidgen of oil, butter, or yolk will prevent your egg whites from ever fluffing up. Additionally, BE CAREFUL not to overheat the mixture as you do not want the eggs to cook and congeal. You simply want the egg whites to be slightly warm, which does not take long at all.

Step four.
Remove from heat, add cream of tartar and salt and beat with electric mixer until egg whites hold stiff peaks, about 5 minutes. BE CAREFUL not to over-beat the mixture, as this will deflate your meringues faster that no body's business. Add vinegar and mix just until incorporated.

Step five. Gently fold in reserved powdered sugar mixture. BE CAREFUL not to dump the sugar in and over-stir. This too will deflate your meringues. Instead, try sifting in the mixture or sprinkling it through a strainer.

Step six. Drop large tablespoonfuls onto the parchment-lined baking sheets and bake for 30 - 45 minutes. BE CAREFUL not to under-cook your meringues. You will know that they are done when you can lift them off the parchment sheet without ripping off the bottom of the meringue.
-Adriana

Thursday, January 15, 2009

improvising: do it with pasta!

It hurts when the clouds of crunchy meringue fresh from the brand new KitchenAid that you had imagined actually emerge as rock-like blobs. But don't you fret (and don't you pout), for there is Pasta Puttanesca, which will make you feel all better. Take it from me.
Today, during my religiously regular reading of Mark Bittman's blog, I came upon his Pasta Puttanesca recipe. Translated as 'whore's pasta', this Italian dish carries with it a fair share of wives' tales about why it got its name. My guess is that somebody really wanted people to order this cheap, easy-to-make dish from a menu and therefore tapped into that lascivious curiosity most of us have that makes us just have to order that. If my theory is correct, that person was successful.
Regardless of what, ahem, made me first try this dish, the taste is what keeps me coming back. It's my favorite dinner that my mom makes, and it was the first thing I ever made for Mary (back then I didn't cook a lot, and Mom said it would be easy). The great thing is, even if you mess it up, it still tastes incredible. Bittman's recipe calls for only three puny anchovies, but I generally throw in a whole tin (about 12). They add this great unctuous-ness and are actually really nutritious. Bittman also calls for black olives, but I usually use calamata. Today I found a delicious-looking mixture of plump specimens at the market, so I opted for that. You can also serve it over any pasta (or grain, for that matter) that you having lying around. I like it on whole wheat penne, but tonight we enjoyed it atop a fancy pasta we got as a holiday gift. In addition, this freezes really well. I highly recommend doubling the recipe and saving it in small freezer bags or Tupperware for midweek meals. 
-Kylie
*One last thing: I love to grate a hard cheese like parmesan or pecorino romano on top, but one NYTimes commenter said that it was blasphemous to mix cheese with fish in Italian cuisine. In this case, I urge you to break that rule. I'm pretty sure you'll be glad you did.

Tuesday, January 13, 2009

Recipe for disaster

Aaaah, life lessons. Can't live with 'em, can't live without 'em, I always say. In fact, I can think of quite a few of my own life lessons right off the bat.

When I was 10 I learned that roller-blading down steep hills sans knee pads is generally a bad idea. When I was 13 I learned that just because you sewed your own costume for the medieval fair, you were not necessarily cool in the eyes of your fellow 7th graders. When I was 19 I learned that one should never date anyone who pops the collars of his polo shirt and is not being ironic. And last night I learned that just because I have a brand-spanking-new KitchenAid to play with, I do not, in fact, have the equivalent of a degree from Le Cordon Bleu Pâtisserie.

Ah well, I had to learn sometime.

Here's what happened. Moments after pulling my shiny KitchenAid out of the packing peanuts and setting it in its place of prominence on my tiny kitchen counter, I dove into my first 'beater-dependent' cooking experiment: Meringues. I had just watched a TV special on the making of meringues and so obviously had no need for a *scoff* recipe. In went the egg whites (and maybe a little yoke, but who's counting anyway?) Unfortunately, after a good 10 minutes of beating, those darn egg whites were as runny and solid as ever. Not even a hint of froth.

"I know how to save this!" I told myself confidently. "I've been baking for years, how hard could it be to invent something new?" As it turns out, improvising a baked good is somewhat trickier than improvising a stew or a curry or a casserole. Go figure.

The resultant cookies were ...gelatinous ...flavorless ...gummy ...pithy ...dense ...and, to add insult to injury, stuck fiercely to the pan. How could one person manage to fit all these characteristics into one batch of cookies? If you're really that curious, please refer to the recipe below.

In conclusion, a few ingredients were wasted, a sweet tooth was left unsatisfied, and my pride was a little worse for wear. Aaah, life lessons. Can't live with 'em, can't live without 'em...I always say.

Life-Lesson Chocolate Almond Lumps
Ingredients
2 egg whites
1/2 cup whole wheat flour
1/2 cup old fashioned rolled oats
1/4 cup gluten powder
1/4 cup slivered almonds
1/2 teaspoon baking powder
1/4 cup milk
1/4 cup water
pinch of salt
1 oz. shaved semi-sweet chocolate
stevia to taste

Step one: Throw everything into the bowl of your mixer.

Step two
: Mix on high until everything is more or less mixed together. Actually, mix as long as you want, there's nothing you can do to hurt this recipe.

Step three
: Spoon lumps onto a cookie sheet. Be sure not to grease the cookie sheet first if you want the cookies to stick to the pan like mine did.

Step four
: Bake for about 10 minutes at 375 degrees, or until the shapeless lumps remain shapeless, and the grayish dough takes on a gray-erish tint around the edges.

Step five: Allow cookies to cool completed before attempting to consume them. I recommend attacking them with a truckload of milk and the number of your local Orthognathic surgeon.

Happy Gnawing!

Sunday, January 11, 2009

Diversifying your assets: a lesson on recession-proofing your kitchen

Well, look at that. The long-foretold recession is here. I know this for several reasons. 1) My most recent Vanguard statement showed that my IRA Roth has gone from a juicy plum to a dour prune, 2) NYtimes.com told me so (many times), and 3) everyone's abuzz with how they "should have diversified, oh man, why didn't I diversify?"

As someone who nearly failed the one economics class on her college roster (and who needed explanation), I called in the big guns...my roommate with the ivy-league economics degree. The conversation went something like this:

Me: Hey, um, so what's 'diversifying your assets' mean?
Roommate: It's part of managing your portfolio. Basically you don't want to have all of your eggs in one basket in case something fails, so you put your assets into a variety of stuff.
Me *brows furrowed with intense concentration*: I see......so you're saying that if I really want something to do well, I need to spread the risk out....or...'diversify'....yes, I think I see it now....
Roommate: ...er, glad to help

That afternoon I put my new-found economic knowledge to the test; I made birthday treats.

But did I make just one type of treat? Heavens, had I learned nothing about risk management that day? Did I made just two types of treats? No self-respecting economist would ever accept those odds. No, I made three, yes three, types of birthday treats. And it was darn lucky I did (since I forgot about the popcorn-aversion of one good friend). So here's a quick economics lesson from me to you: when baking birthday treats, never forget to diversify, diversify, diversify!

Keynesian Popcorn Caramel Crisps
Adapted from Whole Grains Every Day, Every Way, by Lorna Sass
Ingredients
1 1/2 cups sugar
2 tablespoons freshly squeezed lemon juice
1 tablespoon unsalted butter
1/2 teaspoon baking soda
5 cups plain popped popcorn
1 cup almonds, coarsely chopped

Step one: Spread out a length of waxed paper or saran wrap to make a stick-free working space. Pour sugar in a heavy saucepan with the lemon juice and 1/2 cup water. Place the pan over medium-high heat and bring the mixture to a boil. Continue boiling and stirring until the color begins turning from light to dark amber (about 8 minutes of boiling). Continue cooking and stirring for another two minutes, or until the mixture is a few shades darker, and then immediately stir in the butter and baking soda. Lorna Sass warns that at this point you should stand back because the mixture may splatter, but I found it just frothed up and turned bright red (and yes, I did cackle like a mad scientist).

Step two: Turn off head and work quickly to stir in half the popcorn and nuts, coating them evenly before stirring in the other half. Continue to work quickly as you set heaping tablespoonsful of the mixture onto the waxed paper. When the mixture is cool enough to handle, shape each mound into a ball, and let them cool completely before storing them in an airtight container.

Stagflation Spanish Peanut Saucers
Adapted from Great Cookies by Carole Walter
Ingredients
2 cups salted Spanish peanuts
1 1/2 cups all-purpose flour
1 teaspoon baking soda
1/2 teaspoon salt
1/2 cup butter
1 1/4 cups creamy peanut butter
1 1/3 cups sugar
5 egg whites
2 teaspoons vanilla extract

Step one: Preheat oven to 375 and cover two large cookie sheets with parchment paper. Take 1/2 cup of the peanuts and chop them into small pieces using either a food processor or a knife. Combine with flour, baking soda and salt and mix well.

Step two: Place butter in a saucepan and melt slowly over low heat. Cool to tepid before blending in the peanut butter with a whisk. Stir until smooth and creamy and then stir in the sugar. Add four of the egg whites and vanilla and mix thoroughly to blend. Add the dry ingredients but mix just enough to combine.

Step three: Whisk remaining egg white in a small shallow dish with 2 teaspoons water. Place the remaining 1 1/2 cups peanuts in a wide, shallow dish. Take a 1/4 scoop of dough, and then tap on the counter to release it. Dip the top side of the dough into the egg white and then into the peanuts, covering the surface generously. Place the dough, nut side up, on the cookie sheet and press the surface gently with the heel of your hand, flattening the ball into a 3-inch disk. Place cookies three inches apart on the baking sheet, and sprinkle the top of each cookie with about 1/2 teaspoon of the remaining sugar.

Step four: Bake for 14 to 16 minutes or until the sides of the cookies begin to brown and the tops are set.

Federal Deficit Fudge
Indredients
2 1/2 cups sugar
3/4 teaspoon salt
1/4 cup butter
5 oz. evaporated milk
1 Jar marshmallow fluff
1 teaspoon vanilla
12 oz. semisweet bakers chocolate

Step one: Take a 9-inch square baking pan and line with tin foil. In a large saucepan, combine the first 5 ingredients. Stir over low heat until blended. Heat to a full rolling boil, being careful not to mistake escaping air bubbles for boiling. Boil slowly, stirring constantly, for 5 minutes.

Step two: Remove from heat and stir in vanilla and chocolate until chocolate is all melted. Pour into the lined pan, and allow to cool for at least 4 hours before cutting into 1 inch pieces.
-Adriana

Sunday, January 4, 2009

Best Friends Forever

Have you ever had a best friend you've never met? Well, I have. Her name is Lorna Sass. If only we ever got the chance to meet, I know we'd be best friends forever and ever (and I'm talking about a friendship complete with matching necklaces, a secret language and a hidden fort). It's such a cruel fate that our paths have never crossed, because she gets me like no one else. She understands just how important a good bowl of warm oatmeal is on a cold winter morning. She embraces hominy and teff and sorghum and all the other oft-neglected grains. She even understands that wild rice is not actually a rice at all, but a member of the grass family! Sigh.

I met Lorna just this morning when I flipped open her book Whole Grains Every Day, Every Way while having my morning coffee. And, as I may have alluded to earlier, it was love at first read. Lorna, bless her soul, has traveled to the ends of the earth in order to find the best way to prepare and cook each grain as well as the tastiest accompanying flavors. I spent a dreamy hour browsing the recipe section until I found the perfect side-dish to accompany the steak that was planned for my dinner. It was delicious. Or, more specifically, it was sunny, hardy, fiery, and honeyed, topped with a spicy citrus bite. Just the type of unexpectedly sweet side-dish that should be shared with your new best friend. P.S. Lorna, if you're reading this, please do give me a call!

Wild Rice with Gingered Squash
Adapted from Whole Grains Every Day Every Way by Lorna Sass
Serves 6

Ingredients
1 medium butternut squash
salt to taste
1 to 2 inch piece of ginger, peeled and chopped finely (1/8 to 1/4 cup)
2 to 3 teaspoons honey
2 cups cooked wild rice
1tablespoon unsalted butter
1 1/2 teaspoons grated orange zest

Step One. Cook the wild rice. Rinse 3/4 cup dry wild rice grains. Place the rinsed rice in a heavy-bottomed sauce pan with 1 3/4 cup water and bring to a boil. Cover, reduce the heat, and in Lorna Sass' words, "cook until some of the rice splits open and some of the grains have 'butterflied' (split open and curled), 35 to 65 minutes." Done rice should be soft and chewy with just a hint of crunch. When the rice has finished cooking, cover it and let it stand for 5 minutes.

Step Two. Steam the squash. Peel and seed your squash before cutting it into 1 inch chunks. Pour 1 cup of water into a large, heavy saucepan. Add the salt and bring to a boil. Stir in half of the ginger. Add the squash and distribute the remaining ginger on top. Cover and cook over medium-high heat until the squash is tender, about 12-15 minutes. Check every few minutes and add boiling water, if needed to maintain the water level. When squash is tender, use a slotted spoon to transfer the squash to a serving platter and cover it so that it stays warm.

Step Three. Make the glaze. Stir 2 teaspoons of the honey into the cooking liquid, and boil over high heat until reduced and slightly syrupy, about 5 minutes. Stir in the wild rice, butter and orange zest, plus more honey, if desired. Lower the heat and simmer for another minute.

Step Four. Combine and serve! Pour the mixture over the squash, toss lightly, and serve immediately.
-Adriana
 

Subscribe in a reader

Adriana Willsie and Kylie Springman ©2009