Showing posts with label Breakfast. Show all posts

Monday, January 24, 2011

how to make your lover melt (a.k.a. cornmeal spoonbread)


Well. It has been a while, hasn't it?

We've missed you, you wonderful Thin Crust Deep Dish readers. But we're back now.

Hi.

The fact that we haven't been here, though, doesn't mean we've been doing nothing. Far from it. Since we last checked in, Adriana's graduated from culinary school. (Or maybe you already knew that? I can't even remember, that's how long it's been.) And I've gotten a new full-time job. It's gay-er than the last one, which means it gets major bonus points in the Cool Job category.

Oh, and, you know, ADRIANA STARTED A BUSINESS and ohmygosh it's the greatest thing since, well, spoonbread, which is what we'll be discussing today, coincidentally. Seriously, though, Adriana's pet portraits are truly adorable, and you really should check them out, even if, like me, you don't yet have a pet but simply like to fawn over them.

Speaking of businesses, I've started one, as well. It combines my love of making people feel beautiful through portrait photography with figuring out how to bring that beauty to the world through life coaching. It's a seriously good time.

Both of us usually blog twice a week at our respective websites, so if you're jonesing to hear from us more often, we'd love to have you visit.

Otherwise, we'll be here. Less frequently, sure, but here nonetheless.


To return to the task at hand, today I'll be sharing the recipe for a spoonbread that will make your lover melt with delight. Or at least that's what it did for me. I made this spoonbread over our December vacation, when we wanted something special for breakfast but weren't in the mood for pancakes. Mary declared it The Greatest Thing I've Ever Made. Usually, I would brush off such a compliment, as she tends to pull it out every time I make something she likes, but she continued to wax poetic about the stuff for days (and now weeks) after. I made it again last week, and the effect was the same.

With that said, ladies and gents, wield this one with caution. And don't say I didn't warn you.

-Kylie


Cornmeal Spoonbread
Adapted from Whole Grains: Every Day, Every Way by Lorna Sass

1 cup fine yellow or white cornmeal, preferably stone-ground, plus 1 Tb. for coating the pan
1 1/8 tsp. salt
1/2 tsp. honey
4 Tb. (1/2 stick) unsalted butter, cut into bits, plus more for coating the pan
1/2 cup well-shaken buttermilk (I used regular milk, and it still turned out spectacular.)
3 large eggs, separated
3 Tb. finely grated cheddar

Serves 4 to 6

Set the rack in the center of the oven and preheat the oven to 375 degrees Fahrenheit. Lightly butter a 1 1/2- or 2-quart souffle dish or an 8-inch square baking pan. Use 1 Tb. of the cornmeal to coat the bottom and sides of the pan. Set aside.

Pour 2 1/2 cups of water into a heavy 2-quart Dutch oven or saucepan. Whisk in the cup of cornmeal until well blended. Set over high heat and bring to a boil. Stir in the salt and honey. Reduce the heat and cook uncovered at a gently boil, stirring frequently to prevent sticking and lumping, until the mixture resembles a thick porridge, 5 to 6 minutes.

Transfer the cornmeal mixture to a large bowl. Add the butter and stir until it melts. Stir in the buttermilk and then the egg yolks.

In a mixing bowl, whip the egg whites to soft peaks. Fold half the whipped whites into the cornmeal mixture until just incorporated. Then gently fold in the remaining whites. Do not overmix. (It's okay to have a few unincorporated streaks of white.) Pour the mixture into the prepared pan.

Place the pan in the oven and bake until the spoonbread puffs up and the edges are golden brown, 30 to 40 minutes. Sprinkle the cheese on top and return pan to the oven until it melts, about 2 minutes. The souffle will remain somewhat jiggly, especially in the center. Serve immediately and with love.

Tuesday, December 29, 2009

it's all riding on breakfast


I was 22 the first time I managed to sleep through the night before Christmas. 

Sad, I know. 

When I was young, I would lay awake all night with ears perked, listening for the tell-tale sounds of Santa coming down the chimney.  Once I got a bit older, I would law awake all night, tossing and turning in eager anticipation of the presents that awaited me downstairs.  And when I got older still, I would lay awake willing myself to fall asleep, because I realized just how ridiculous it was for a college student to be sleepless the night before Christmas. 

Well, I'll tell you this.  After 22 years of lying awake for the long hours preceding Christmas, I've given a fair bit of thought to the very important matter of Christmas morning breakfast.  I think we can all agree that this is one of the more important breakfasts of the year (right alongside breakfast on the first day of school, and Easter breakfast).  Needless to say, a well-chosen and well-executed breakfast on any one of these days has the power to rocket your day towards the divine, while a haphazard and half-hearted breakfast can set a dismal tone for this most important of days.  Yes, in my opinion, a lot rides on breakfast.  But then again, I think a lot rides on lunch and dinner as well.  And snack.  Don't forget snack.

And the more I've thought about breakfast, the more I've come to realize that it's not the amount of time to prepare, or the amount of money spent, or the number of exotic animals and plants harvested that make or break the meal.  Rather, the breakfasts that really hit home for me are sometimes the simplest of all.

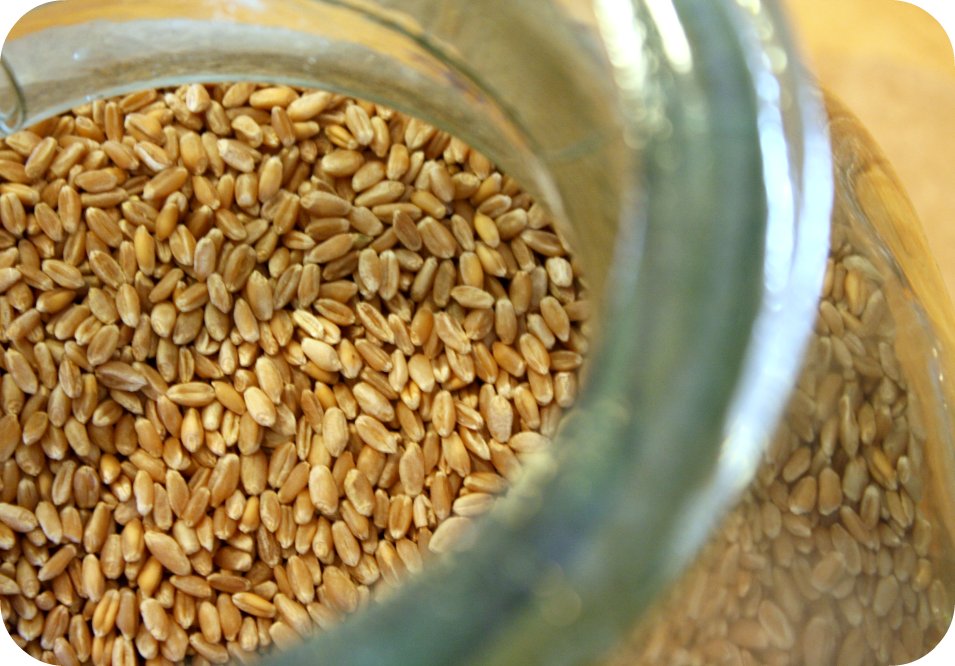
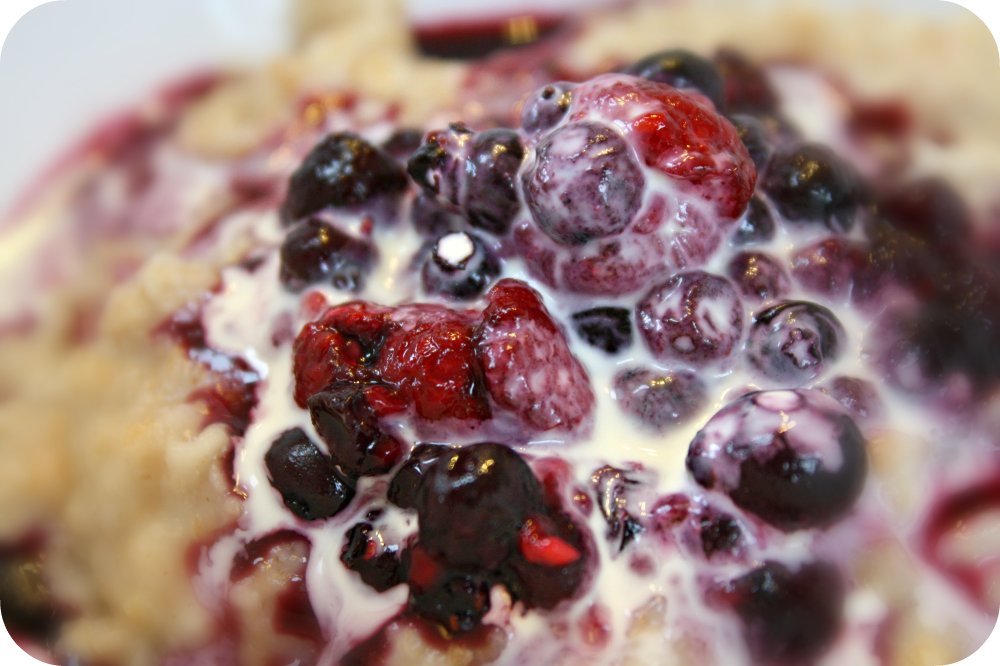
Take Christmas morning.  When I finally rolled out of bed at noon (I know, what an achievement!) I wandered downstairs to find my mom giving a few final stirs to a pot of berry compote simmering on the stove.  We sat down to steaming bowls of her oat-wheat porridge topped with fresh cream and berry compote.  If you're lacking inspiration on the breakfast front, I recommend you give this simple recipe a whirl.  It's immeasurably rich, bursting with brightness, and wholesome to the core. 

That's pretty good for a bowl of oatmeal.

My Mom's Oat-Wheat Christmas Day Breakfast Porridge


Oatmeal
1 cup of rolled oats
1/4 cup rolled wheat berries (optional)
2.5 cups water (only 2 cups if there are no wheat berries)
pinch of salt

1.  Bring everything to a simmer, stirring constantly
2.  Let it simmer 5 minutes, stirring regularly, and then remove from heat
3.  Ladle into large breakfast bowls

Berry Compote
1 cup frozen berries (any kind you like) - we used wild blueberries and organic raspberries
1 tablespoon honey
citrus zest (optional)
a touch of water if necessary

1.  Bring everything to a simmer
2.  Cook just until berries are soft.  If you cook it too long, berries will taste jammy.
3.  Ladle on top of porridge
4.  Top everything with a generous splash of whole cream.  Don't even think about reaching for that skim milk.


-Adriana

Sunday, October 18, 2009

sugar freedom

Poaching Pears

This past couple of weeks, I've been joining in a virtual event hosted by Kimi of The Nourishing Gourmet called the Sugar-Free Challenge. If you know me, now is probably the time that you should say, "What? Sugar free?" I know; it's shocking. I'm the one who would rather smuggle candy than popcorn into the movies, the one who bakes cookies to share with coworkers for no reason at all. My hope is that, from this challenge, I'll still be the same sweet-loving person, but in a more natural and nourishing sense. And anyway, there are three levels of the challenge, and I started with the most basic. You can get more details about what the challenge is and the different levels here. While Kimi's challenge ended last week, I'm still going on my own personal challenge.

I don't know what it was that made me think I could successfully complete this challenge. Perhaps it's just that, similar to Adriana, I'm drunk with love over fall and everything the markets have to offer right about now. But usually my favorite fall things include a particular sandwich cookie with neon orange cream filling. And the small dishes of bite-sized candies that start popping up in every office and shop in mid-October. This year, though, things have been different.
 
When Kimi posted the challenge, I realized that I wanted to, and could, join in. So here I am. It's almost two weeks later, and extracting processed sugars and white flour from my routine hasn't been the tug-of-war of will versus desire that I had expected. Instead, sugar-free has felt simply like freedom. Please note that I've been debating with myself about whether or not to blog about this, afraid that committing this experience to keyboard would somehow break this sugar-free spell and that I would suddenly find myself incapable of resisting all highly refined products and slipping into a mire of darkness and ill-health with which I associate them. However, I'm taking that chance, as I think there are several elements of this sugar-free week from which others (and I) can benefit. Here are some of them.

1. Eat lots of fermented foods. This may not be true for everybody, but for me, eating fermented foods has really helped to reduce cravings for sweets and other refined carbohydrates. If you know why this is, please chime in. My best guess is that fermented foods are more easily digestible and increase healthy intestinal flora, allowing us to extract more nutrients from our food and decreasing cravings for nutrients we aren't getting. These days, if I'm hungry between getting home from work and making dinner, I snack on a half cup or so of Bubbies sauerkraut or my homemade 'kraut. I'm a little bit in love with it.

2. Eat more vegetables. This challenge has been a great excuse for me to fall back in love with my favorite vegetables. Last week, instead of packing my usual afternoon snack of almonds and an apple, I sauteed a red bell pepper and an onion. It was delicious. Funny that I didn't think of sauteed vegetables as a snack before, and that I so blatantly overlooked their natural sweetness.

3. Get enough protein. I know this can be a hard one, especially for the vegetarians and vegans out there.  Plus, who wants to go around calculating the amount of protein you need with each meal? My tactic is to make sure I have some form of animal protein at each meal, be it unsweetened whole milk yogurt, scrambled eggs, chicken or grass-fed beef.

4. Include high-quality fats. Some of my favorites of late have been my homemade cultured butter, coconut milk and coconut oil, almonds, olive oil and whole milk from grass-fed cows.

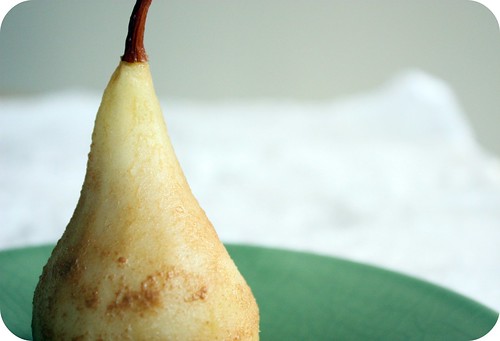
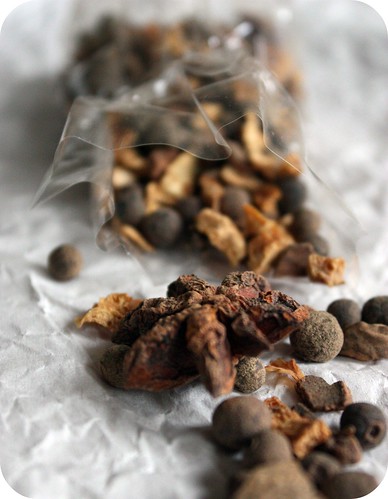
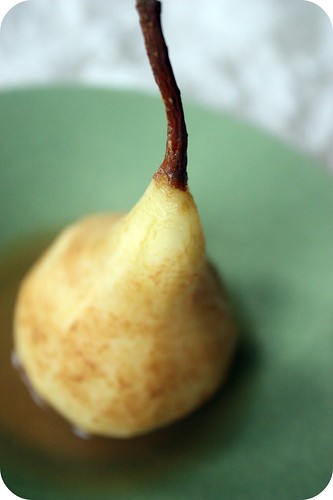
5. Experiment with natural sweeteners. Try out some sweet leaf Stevia in your coffee or tea, or add raw honey to your oatmeal instead of eating sugary packaged cereals. One of my favorite fruit-sweetened recipes is stewed prunes, which are simply luscious and decadent with yogurt. Oh, and this whole natural sweeteners thing is what brings me to my next point: poached pears. I know that even if you're going sugar free, you might still want to share a beautiful dessert with your friends when they come over for dinner. These poached pears are perfect for just such an occasion. Mine are sweetened only with apple cider, and I found them plenty sweet. However, if you want to add a teaspoon of raw honey to the cider as it reduces, I'm sure that would be lovely, as well. I love these pears because they fill the house with autumnal aromas without the sugar and white flour that are in so many fall treats.

Mulling Spices

Cider-Poached Pears for Fall
Serves 4


2 cups fresh apple cider
2 Tbs. mulling spices
4 pears, peeled, halved and cored
Optional: 1 tsp. raw honey

Add the cider and spices to a medium-sized saucepan and bring to a low boil. Stir in the honey if you are using it. Reduce the heat, and allow mixture to simmer, uncovered, for ten minutes.

Meanwhile, peel, halve and core your pears and place them gently in the liquid. Continue to simmer for 10 to 15 minutes, until the pears yield easily to the tines of a fork but are not falling apart. By now, your liquid should have reduced to half its original volume. If it has not, remove the pears when they are tender and continue to reduce poaching liquid.

Remove the pears from the pan and place in shallow bowls. Strain the liquid into a bowl to remove the spices, and generously spoon the liquid on top of the pears. Serve warm as a dessert, or cooled as an accompaniment to breakfast yogurt.

*Note: You'll notice that the pears I photographed were not halved and cored. I did this because they are pretty to serve that way. However, on second thought, it's much easier for people to eat these if you do the coring before you poach, which is why I included that step in the recipe.

-Kylie

Cider-Poached Pear

Friday, September 25, 2009

nigel slater's plum (i mean apple) cake

Apple Cake and Cream

"I have always felt that a recipe should be something to inspire, remind and lightly influence rather than a set of instructions to be followed, pedantically, to the letter."
-Nigel Slater


Since I bought Nigel Slater's The Kitchen Diaries a few years ago, it's made every move with me. Dorm to dorm to house to house to apartment, The Kitchen Diaries is always the key book that gets packed, right after the socks and rainbow flair and other daily essentials. It's like a security blanket to me, the book I can pull out when I feel like plopping down on the couch and reading with a cup of tea.

This book has served me well. It's just as good to cook from as it is to sit and read. It's organized by seasonality into months, so I can easily flip to the right section when I want to make something and don't quite know what. And to be truthful, I think Nigel and I may be connected by blood in some far-off capacity. Learning about his sensibilities around food feels like coming home to me, and he's always saying what I mean better than I could.

First Fall Apples

Nigel loves food when it's dressed-down, unfussy. He takes his fruit just at the tip of its freshness, spilling over into too-done juiciness. He isn't particular about measuring and doling out patronizing instructions; rather, he seems to know that you know what's best and that you know what you like.

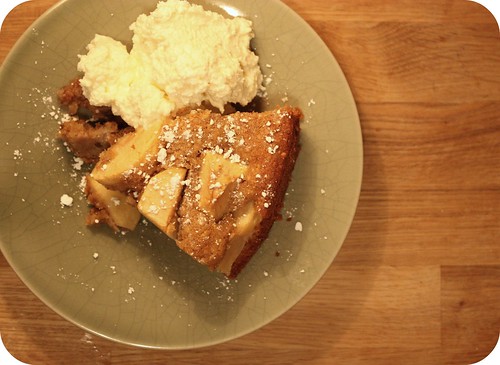
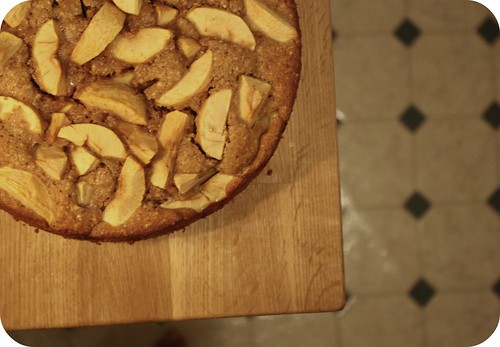
In short, I felt that Nigel might just be okay with me making his plum cake with what I had on hand instead: the first little New England McIntosh apples of the season. I took a few liberties, as well, baking it in a springform pan instead of a square pan because I didn't have one, and substituting quite a bit of the flour with white whole wheat flour. I don't think this cake was worth for the wear. Crumbly and stuffed chock-full of apples, it uses very little sugar and flour, making it just as nice to serve alongside your breakfast eggs and coffee as it is as an after dinner treat topped with vanilla whipped cream.

Butter and Sugar, Natural Light

Nigel Slater's Plum (I Mean Apple) Cake
Adapted form The Kitchen Diaries

 10 Tb butter
1/2 cup sugar
6 McIntosh apples
3 large eggs
2/3 cup white whole wheat flour
1/3 cup all-purpose flour
1 3/4 Tbs. baking powder
2/3 cup ground almonds
1/2 cup shelled walnuts

Set the oven to 350 degrees. Line the base of a square 8-inch cake pan or springform pan with parchment. Grease the pan's sides.

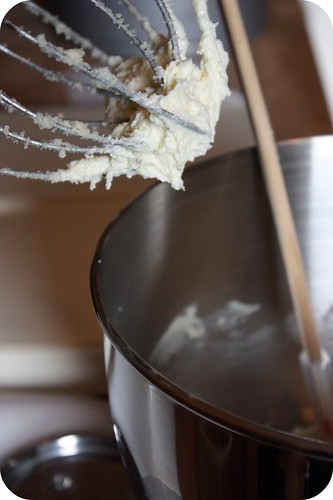
Beat the butter and sugar until pale and fluffy with an electric mixer. Beat it until it is, as Nigel says, "light, soft and the color of vanilla ice-cream". Peel and core the apples and cut each one into eight sections.

Break the eggs, beat them lightly with a fork, then add them bit by bit to the butter and sugar. Whisk together the flour and baking powder, and fold them gently into the mixture using a wooden spoon. In a food processor, grind 2/3 of a cup of almonds until they are the texture of cornmeal, and fold them into the batter. Chop the walnuts to "the size of small gravel" and fold them in, too.

Scrape the mixture into the cake pan, dropping the apple sections in on top. Push the apples down into the batter a bit. Bake for 45 minutes, then test for doneness by inserting a paring knife to the bottom of the pan. If it comes up clean and free of batter, the cake is done. Remove the cake from the oven and let it cool for fifteen minutes before turning it gently out of the pan.

Cut into slices, and serve alone, with whipped cream or a drizzle of heavy cream.

Serves about 12


Apple Cake -Kylie

Tuesday, April 7, 2009

meeting my rock star


Like many people out in the Land of Food Blogs, I made sure to catch Molly Wizenberg of Orangette during her recent book tour. For the record, everything you've read is true. She's as sweet as her writing. Getting to see her in person was a bittersweet experience for me. Her blog has come to symbolize so much of what I love and long for about Seattle: Its nerdy chic; flourishing DIY ethos; blindingly gray afternoon light (that Molly captures so eloquently in her photographs); and subtle, fresh food. As I clumsily attempted to tell her within ten seconds how much her writing means to me, I realized that me getting to meet Molly was much like Mary getting to meet Gwen Stefani. Or my friend Terra getting to meet George Stephanopoulos. Or my mom getting to meet Melissa Etheridge. Needless to say, I don't think I conveyed to her how very fantastic I think she is. That's okay. I've gotten to spend some time with her book, and that's nearly as good.

I purchased Molly's book as a gift to my mom, but it's been getting quite a bit of use before even reaching its intended owner. (Mom; I hope you'll forgive a couple of olive oil and/or batter splatters. Consider them a reminder of how much I love you). Each story is a confession, a small part of Molly that she has packaged for her readers to share. The accompanying recipes are treasures. Sometimes odd and always incredibly delicious, Molly presents them carefully and at the perfect moments within her gentle narrative. 

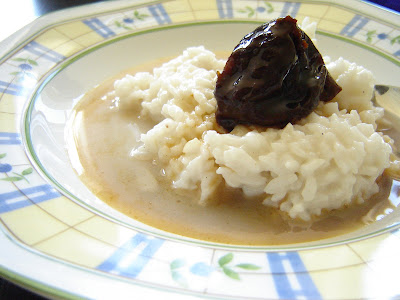
This weekend, searching for a special breakfast to prepare for some vegan, gluten-free friends, I decided to pull together a sort of vegan rice pudding with stewed prunes on top. I know you don't think it sounds good, but it was. It really, really was. I stewed the prunes the night before, which took all of two minutes, and I whipped up the pudding in the morning with leftover rice from dinner. Lucky me, there are still plenty of prunes left over in the fridge, and I've been savoring them for the last few days. Even if you don't think you like prunes, I think you should try these. They are so good, so simple, and yet so decadent.

-Kylie

Vegan Coconut Rice Pudding With Stewed Prunes

Stewed Prunes
Adapted from Molly Wizenberg's A Homemade Life

1 orange, preferable seedless
1 pound pitted prunes
1 cinnamon stick

Cut the orange in half from stem to tip, then slice it into six sections (including peel), picking out any seeds. Put orange slices in a medium saucepan with prunes and cinnamon stick, and add water just to cover. Place over medium heat, bring to a gentle simmer and cook, adjusting the heat as needed so that the liquid barely trembles, for 30 to 45 minutes, or until the prunes are tender, the orange sections are soft and glassy, and the liquid in the pan is slightly syrupy. Remove the cinnamon stick and orange sections, cool (if you want to) and serve. You can also let the prunes cool to room temperature and then store them in a sealed container in the refrigerator for up to a week. 

Coconut Rice Pudding

4 cups of leftover rice (any type, though I used jasmine)
1 16 oz. can of coconut milk
1/2 tsp. cinnamon
1/4 tsp. cardamom
1 tsp. agave nectar or honey

In a small saucepan, combine rice and coconut milk. Stir until any clumps of rice break up and it is warmed through. Add cinnamon, cardamom, and agave or honey. Serve topped with rice milk and stewed prunes.

Saturday, March 7, 2009

breakfast for a sunshiney day


New York weather sometimes feels miraculous. 

Just this week, it snowed eight inches in one night, and we trudged to the subway through fluff that reached well above our ankles. Today, most of us got on our jackets, went outside, turned right around, and came back in to shed them. It's warm out. It isn't just warm like put-on-a-sweatshirt-and-sit-outside-the-coffee-shop-shivering-in-the-sunshine warm. It's wear-your-t-shirt-and-jeans-and-bask-as-it-warms-your-face warm. It's the kind of warm that made me take a run around Prospect Park this morning instead of going to the gym as I had planned. I smiled as I stepped outside and walked down the stoop into a world that was a little different than yesterday's. In this sunny world of spring, there are young families strolling with their babies and confused toddlers, couples holding hands as they listen to music on shared iPod earphones, and very old men and women who have lived in the neighborhood for years. They walk slowly and let others pass them. They've walked these streets enough times to know that the sunshine feels best when one soaks in it at one's own pace.

This sunshiney day is the perfect time to try making millet porridge, if you haven't done so already. I've been experimenting with millet a lot over the past week or so, and I've wanted to share it with you. I prepared it in my rice cooker, and it turned out perfectly. You can also make it on the stove; I just didn't because I nearly burned my favorite pot to its death trying to make rice a few weeks ago. The night I made the millet, I ate it with a soupy green curry. And then there were leftovers.

When millet is prepared, it begs for a liquid to moisten it. The cooked grain itself has a nutty scent that reminds me of nutmeg. Milk, cream, or coconut milk complement it beautifully. Once you combine the grain with some type of milk, you can make endless additions to the cereal. I simply grated on some cinnamon and nutmeg and then pinched in a few drops of stevia. However, I think it would transport you to Fantasy Breakfast Land if you added any or all of the following: Apple sauce, chopped dates and pecans, dried cranberries and apricots, rehydrated raisins, fresh strawberries, citrus zest, agave nectar, raw honey, bee pollen, good preserves, sliced almonds, vanilla extract, pumpkin seeks, flax seeds, lavender blossoms, flax seeds...

Are you still there? Phew; I went off on a tangent there. Glad I didn't lose you. My point is, you can do a lot with this. You could also make it into a savory breakfast, or add an egg as I did for some more protein. 

One of the reasons millet appeals to me so very much is that it is gluten-free. It has been around for thousands of years (literally), a staple in many Indian, Russian, and African cuisines. It grows easily on soil that is bereft of nutrients, making it ideal to feed those living in arid climates. And it is free of gluten, meaning that those with wheat sensitivity or gluten allergies can eat it safely. As a flour, millet lends baked goods a tender crumb, though it doesn't allow them to rise. This makes it an excellent base for flatbreads. And so the recipe I present below is both gluten-free and vegan. While I eat nearly everything and have few food aversions, I know that many of you out there must be careful. And if you're unable to eat refined sugars and want to sweeten this up, try it with stevia as I did. 

Millet Porridge
Makes 4 servings

1 cup dry millet
2 cups coconut milk
Pinch of cinnamon and nutmeg, or other garnish of your choice

Step 1 (Rice Cooker Method): Rinse millet in a colander. Place it in rice cooker with three cups of water. Let the rice cooker do its magic, and proceed to step 2.

Step 1 (Stovetop Method): Rinse millet in a colander. Boil three cups of water, add millet, and return to a simmer. Cover and allow to simmer slightly for about 25 minutes, or until water has absorbed. Be careful that you keep the heat low enough that the grain doesn't burn onto the bottom of the pan (trust me). 

Step 2: Mix cooked millet with coconut milk in saucepan. Whisk together until porridge has warmed. Add your chosen garnish and mix it in, or spoon the porridge into bowls and sprinkle on top. 

-Kylie

Saturday, February 28, 2009

There's been an addition...

I have some very exciting news. I'm not kidding, it's very exciting. In fact, I've been waiting anxiously all day to tell you. For the first time, I've plunked down my hard-earned cash and purchased my first ever 'big kid' toy. And it is a beautiful, no stunning, no dazzling digital SLR camera. I don't mean to brag, really. I've just been so excited about the newest addition to my family that I've been gushing like a breathless, first-time mother. Isn't she perfect?! Have you ever seen a more beautiful SLR in your life? She looks just like her mother, doesn't she? Er, I'm sure you can appreciate my enthusiasm.

But enough about my camera, it's time to talk about my breakfast. Saturday morning breakfast may very well be my favorite meal of the week. First, you can incorporate any food you like, sweet, savory, or in between, without even a hint of guilt. Second, you have all the time in the world to enjoy your creation. And third, you don't have to wait around impatiently all day to eat it. As per my usual Saturday morning routine, I woke up with thoughts of breakfast already floating through my brain. It was going to be a muffin morning, I could just feel it in the air. And bacon. Yes, bacon, that's sounds delicious. And so, before I had even tumbled out of bed, a plan was hatched for savory bacon-cheddar-green onion muffins. These are sinfully delicious, eye-catchingly unusual, and happily hearty breakfast pastry. On a cold February morning when the trees are bare and snapping around in the wind, nothing beats sitting down to a Saturday brunch of bacon muffins with apple jelly, scrambled eggs, and tea. Just nothing.

Adriana's Bacon Muffins
(for a Cold February Morning)

makes 6 muffins

Ingredients
4 slices bacon
3/4 cups all-purpose flour
1/4 cup cornmeal
1/4 teaspoon salt
1/4 teaspoon paprika
1/2 cup sharp cheddar cheese, shredded
1 egg
1/2 cup milk
2 green onions, white and light green parts chopped


Step one: Preheat oven to 400 degrees. Line 6 muffin cups with paper liners or lightly grease.

Step two: Cook bacon in a large skillet until crispy. Transfer to paper towels to drain, and reserve 1 tablespoon bacon fat from pan.


Step three: Whisk together flour, cornmeal, baking powder, salt, and paprika in a bowl, then stir in the cheese.

Step four: Beat together the egg and milk, and barely stir into the dry mixture.

Step five: Crumble bacon into the batter, add the bacon fat, and fold until just blended.

Step six: Spoon batter into the prepared muffin pan, bake for about 19 minutes, and then let cool for about 10 minutes before serving.


-Adriana

Sunday, November 9, 2008

It's 6:30 am. Do you know where your breakfast is?

I've done something very...very... stupid. Last month I got myself a gym subscription (smart)...and I paid for the entire year in advance (very dumb). Sure, I got the 20% discount. They even waived my signing fee. But now, I inevitably find myself waking up every morning at 6:30 am and promptly engaging in a mental battle of epic proportions. Get out of bed and face the brutal early morning Chicago cold, or lay in bed for another hour cursing myself for wasting money? Decisions, decisions.

Luckily, I've stumbled upon a solution that helps make that daily battle just ever so slightly more resolvable. Did I say solution? I meant recipe...

After a few bouts of wild-eyed experimentation (which may or may not have resulted in pots of burnt seeds, trays of soggy oats, and pans with dried cranberries cemented to the bottom) I've finally developed the bar I've been waiting for. It's not too sweet, it's got both protein and fat, and it's just the right amount of food to eat before a painfully early work out. I do hate to brag, but my oh my aren't they tasty as well!

Adriana's Cranberry Coconut Granola Bars
makes 12 bars

Ingredients:
1/4 cup coconut milk
1/4 cup raw honey
2 cups old-fashioned rolled oats
1/4 cup sunflower seeds
1/4 cup dried, sweetened cranberries
1/4 cup chopped raw almonds
1/4 cup shredded coconut
2 large eggs

Step 1:
Preheat your oven to 225 degrees Fahrenheit. Grease a 9in x 9in baking dish and set aside.

Step 2: In a large skillet over medium-low heat, stir together coconut milk and honey until melted and fully mixed together. Add oats and continue stirring until they are evenly coated. Continue cooking oats, stirring frequently to prevent burning, for another 5 minutes or until they begin to smell...more oaty? Anyhow, I think you'll know it when you smell it.

Step 3: Add all remaining ingredients except eggs and stir contents of pan until evenly mixed. Remove pan from heat and let sit for 5 minutes or so until the pan itself is no longer too hot to touch. Meanwhile lightly beat eggs in separate bowl. When the pan has cooled, pour beaten eggs into the mixture and stir until evenly coated. It's important that your pan cool before adding the eggs lest they cook before getting mixed in. I promise you, no one wants scrambled eggs in their granola bars.

Step 4: Dump mixture into the greased pan and use a spatula or your hands (my personal favorite cooking tool) to press the mixture into the mold. Press down as firmly as possible so that you get a nice, dense bar. This will keep it from crumbling and falling apart when it's cut into individual bars. Put pan in the oven and bake at 225 for roughly an hour. This amount of cooking will give you somewhat chewy bars. If you prefer crunchier granola bars, I would recommend removing them after an hour and cutting them apart before continuing to bake them for another 15 minutes.

Step 5: Remove from oven and carefully cut into bars or squares with a sharp knife. Allow to cool completely on a wire rack before wrapping them up individually and placing one near your gym clothes and keys.

Nutrition Note
One of these bars has 130 calories, 5 grams of protein, 5 grams of fat, 2 grams of fiber, and countless grams of tasty.
-Adriana
 

Subscribe in a reader

Adriana Willsie and Kylie Springman ©2009