
Showing posts with label Pie. Show all posts

Thursday, October 15, 2009

life's little luxuries


I'm going to tell you a little story.  You see, when I was growing up, my parents decided to get rid of our TV.  Traumatic, I know.  They believed that the only way to free their children from the hounding influence of consumerism was to spare us from the hours of commercials we would most surely encounter while watching TV.  Instead of filling our impressionable little minds with jingles for domino's pizza and parades of the latest 'must have collectibles', our young family was going to create our very own sarcasm-free, happy bubble.  Such a lovely thought.


Now here I am, 24 years old and a complete sucker for even the most pathetic attempts of advertising.  I blame this on the fact that I never had the years of TV-watching practice that my peers did.  While most kids were growing into jaded and discerning American consumers with each passing day, I was frolicking through the pacific northwest woods, picking huckleberries, and learning to trust everything I saw and heard.  That's right, I'm now the girl who sees an infomercial for quadro-high-tech-ubber-gripping tires and promptly calls her daddy to ask if she needs to install them immediately on her aging Saturn.  


This innocence (ok, gullibility) is probably why I found myself shelling out an extra $2 at the farmer's market last weekend in exchange for a "Luxury Pumpkin."  There I was, walking amongst the rows of freshly picked gourds when I found myself flummoxed by two identical piles of pumpkins.  On my left I saw a sloppy, hand-written sign saying "Sugar Pumpkins, $2" and on my right a similar one saying "Luxury Pumpkins, $4". 

Well gosh darn if the two sets of pumpkins didn't look exactly the same to me. 

"They're...juicier?" the farm hand hesitantly responded after I asked what my extra two pumpkin dollars might be buying.  While I had no concept of what a "juicy" pumpkin might be like, it was enough information to sell me on the purchase.  That's some hard-core farmer's market advertising right there.  For once though, the advertising definitely worked out in my favor.  This was the meatiest, tastiest, most flavorful pumpkin that has ever graced my oven.  I'll have you know that the skin of a Luxury Pumpkin is a bit darker and thinner than that of a regular sugar pumpkin.  It's so thin, in fact, that you can easily slice right through it with your kitchen knife without softening it in the oven first.  In honor of my beautiful pumpkin, I made a ridiculously rich and delicious pumpkin pie with a friend from culinary school.  I don't know how much credit goes to the recipe, and how much credit goes to the pumpkin itself, but this was far and away the most scrumptious pumpkin pie I've ever eaten.  Ever.
  Ask Hillary, she'll vouch for it.

So, happy pumpkin season to you.  May your days be filled with juicy gourds and honest advertising!


Luxury Pumpkin Pie with Walnut and Brown Sugar Crumble
Inspired by a recipe from the November 2009 issue of Bon Appetit 


Ingredients

(filling)
1 cup packed dark brown sugar
2 large eggs
½ teaspoon kosher salt
½ teaspoon ground cinnamon
½ teaspoon ground ginger
¼ teaspoon ground cloves
1.5 cups pumpkin puree (see below how to make your own!)
½ cup heavy whipping cream

(topping)
½ cup walnut pieces, roughly chopped
¼ cup packed dark brown sugar
½ teaspoon ground cinnamon
Healthy pinch of kosher salt

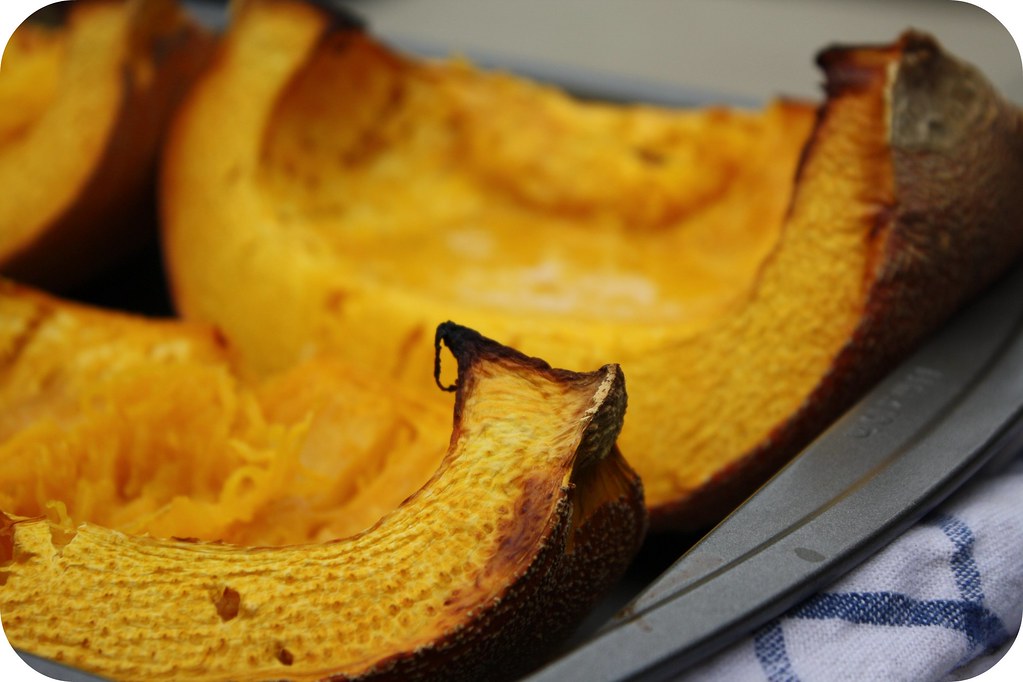
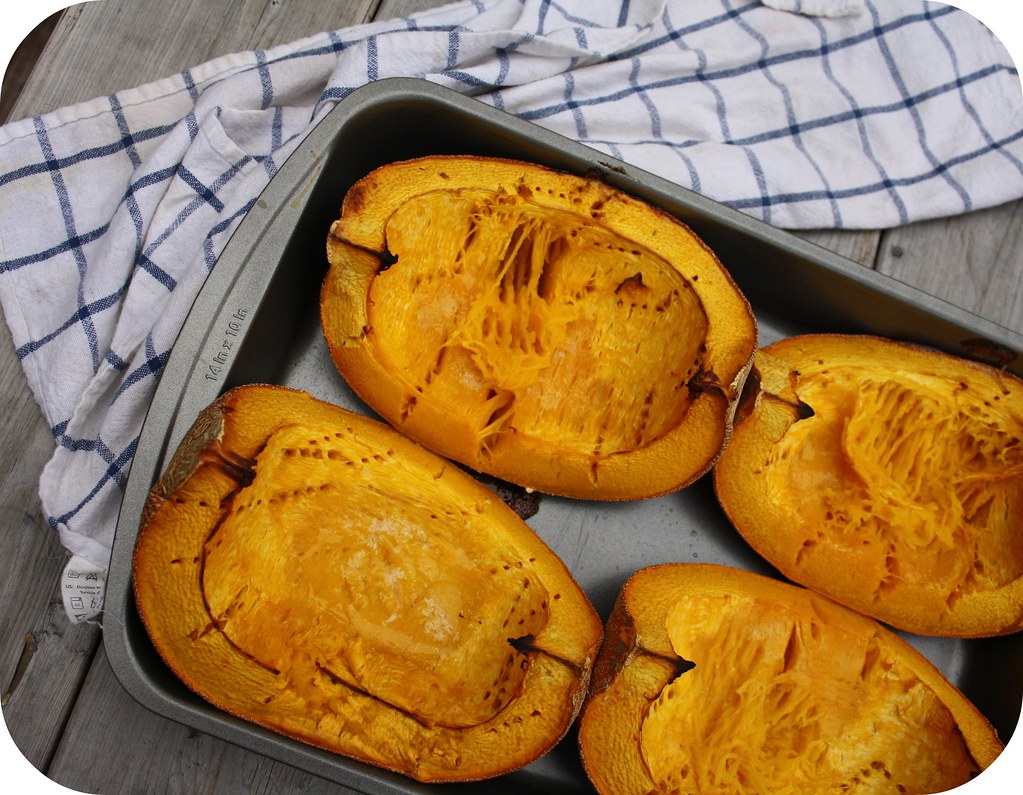
*To make your own pumpkin puree:  Preheat your oven to 350 F.  Cut your sugar pumpkin into 4ths, and remove the stem.  Scrape out the seeds and stringy flesh with a spoon.  Leave only the solid pumpkin flesh.  Rub all the flesh with a bit of butter, and lay face up in the large pan.  Roast your pumpkin until very soft, about 1 hour.  Don’t worry if it becomes darker and caramalized in some areas.  That will only make it infinitely more delicious when it's pureed.  When it's done roasting, peel off the skins using your fingers, and mash it by hand or pulse in a food processor.

Step one:  Make you pie crust.  If you feel up to the challenge, I recommend that you make your own pie crust.  I can gaurantee that it will be more delicious than a store bought variety.  I've found that everyone has their own favorite pie crust recipe, so I won't put one here.  What's important here is that you pre-bake the pie shell.  This means that after it's laid out in the dish, cover it with parchment and put in some pie wieghts or fill it with beans.  Bake it at 425 F for about 12 minutes, remove the weights and the parchment, and continue baking at 350 F for about 15 - 20 min, or until the shell is baked through.  Cool crust on rack while you prepare the filling.
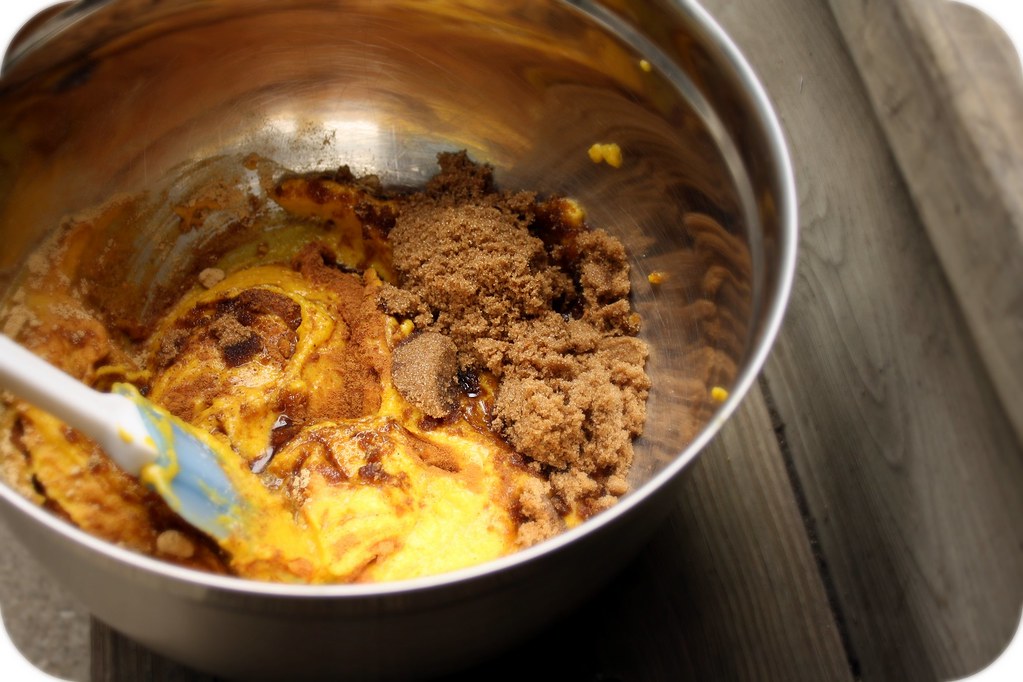

Step two:  Make the filling.  Put brown sugar, eggs, salt, and spices into a food processor and pulse a few times until evenly blended.  Then add the pumpkin and cream and process until smooth.

Step three: Bake the pie.  Pour filling into the prepared crust and bake in the oven at 350 F until filling is almost set, about 30 minutes.  If the crust is browning too quickly, cover with foil.

Step four:  Add the topping.  While the pie is in the oven, whisk together all the ingredients of the filling.  Remove pie from oven when it has set, sprinkle topping over evenly, reduce oven temperature to 325, and return pie to oven for another 15 minutes.  Allow pie to cool completely before digging in.
-Adriana

Monday, May 18, 2009

A Piece on Pie

It’s fun to look at people on city buses. There’s the teenage wannabe punk, with spiked hair and iPod headphones blasting a jangly mess of chords into the surrounding rows. There’s the harried mom of three, fretfully herding her brood into a row a seats near the back. There’s the elderly gentleman teetering his way onto to bus and staunchly refusing the seats offered to him as he clings precariously to the hand bar. There’s the young woman balancing a large, wobbly, steaming pie between two oven mits as the bus hurtles over the pot-holed streets. Oh wait, that one’s me.

Not many people try and take a pie fresh from the oven across the city of Chicago via public transportation. And if you ever hear of someone reaching their destination with their pie untarnished, they deserve a medal. A pie, I have learned, is meant to be eaten close to home. They aren’t built for travel via air, bus, or rail. They don't pack conveniently into boxes or tins. You can't simply throw one in a tupperware and expect it to arrive unscathed.

Why, I asked myself while heading north on Bus 50, is a pie the symbol for classic American home-life? It’s because pies don’t leave home without a fight. And that, in a pie-shell, is what I learned last Sunday afternoon.

That being said, the pie still tasted just fine. In fact, it tasted darn right dandy. I just wish I had been able to present it to my dinner hosts in a somewhat more presentable state. C'est la vie. If you bake a succulent little pie such as this strawberry number below, I advise you to not export the pie, but rather import the pie-eater. And believe me, one whiff and those pie-eaters will be barging down your door.

Home-bound Strawberry Pie
Recipe for crust adapted from Bittman's How to Cook Everything


Ingredients for Pie Crust
2 1/4 cup all-purpose flour, plus more for rolling
1 teaspoon salt
2 teaspoons sugar
2 sticks cold unsalted butter, cut into about 8 pieces
6 tablespoons ice water, plus more if necessary

Ingredients for Filling
6 cups strawberries, fresh or thawed
1/2 - 1 cup sugar depending on the sweetness of the berries
3 tablespoons cornstarch
pinch each of salt, cinnamon, and nutmeg
a dash of milk for brushing crust

Step one: Combine the flour, salt, and sugar in a food processor and pulse once or twice to mix. Add the butter and process for about 10 seconds, or until the mixture resembles cornmeal. Put the mixture in a bowl and add the ice water. Mix the dough with your hands (the fun part!) until you can form a ball. Divide the dough into two balls, wrap the balls in plastic and either freeze for 10 minutes, or refrigerate for 30. Flour a flat surface and place one chilled ball of dough in the middle. Using a rolling pin and working from the center outwards, roll the dough out flat until it's diameter is at least 2 inches wider than the pie dish on all sides. Using the rolling pin for support, drape the flattened crust over the pie dish and gently press into place. Repeat process with the second ball of dough, but this time cut into strips about 3/4 in. thick. Set aside.

Step two: Heat oven to 450 degrees. Gently toss the strawberries with the sugar, cornstarch, salt, and spices. Pile the mixture into the prepared pie crust, heaping it a bit higher towards the center. Using the strips of dough, prepare a lattice top (click here for an excellent visual demonstration of how this is done). Seal the edges by folding crust under and gently pressing down. Brush the top crust with the milk, and then sprinkle with a bit more sugar.

Step three: Put the pie on a baking sheet and bake for 10 minutes, reduce the heat to 350 and bake for another 50 minutes, or until the pie is golden brown. Be sure not to underbake your pie, because this is very easy to do. Cool on a rack or windowsill before serving warm or at room temperature. It's delicious with whipped cream, ice cream or all on its own!


P.S. I had a bit of extra pie crust left over so I rolled it out and filled it with fresh mango tossed with dried shredded coconut and a bit of sugar. Then I folded the sides in to make a tropical fruit galette. Strangely, it wasn't actually too bad. Noah and I wolfed it down while watching the Blackhawks play on TV. I mean, if I freshly baked tropical fruit galette isn't sports watching food, I don't know what is.


-Adriana

Monday, March 2, 2009

Another Day, Another Dinner


There's no telling what I'll be eating for dinner tonight.

Don't even try and take a guess.

For someone who thinks, and dreams, and wonders about food all day long, I have a surprising knack for not knowing what will end up on my dinner plate until about 5:48 PM Central Time. Here's the usual routine. 5:45 PM: exit subway. 5:46 PM: call boyfriend and ask what he's doing for dinner. Now, at 5:48 PM, one of two scenarios will take place: Scenario A. My boyfriend tells me he's making dinner tonight and that I should come partake in it's deliciousness, or Scenario B. My boyfriend tells me he's re-heating pasta tonight in order to cram in 20 more minutes of med-school studying. Scenario B, of course, means that I'm on my own to experiment with whatever ingredients I please in the pursuit of the evening meal.

This is a tale of two dinners.

Scenario A:
Hamburger Pie, Hamburger Pie,
If I don
't get some I think I'm gonna die!
My boyfriend makes a mean Hamburger Pie. When he informed me yesterday that I should sit back and relax, because he had dinner under control, I knew another brilliant Illinois-grown concoction was on its way. Apparently Hamburger Pie is a family recipe, something he's eagerly anticipated and wolfed down at lightening speed since he was just a wee little thing. I was careful to photo document the event so that you too could bake up this culinary celebration of all things american. After all, what could possibly be more patriotic that Pie + Hamburger + the Pillsbury Doughboy (don't worry, I'll get there).

Ingredients:
1 tube Pillsbury Crescent Rolls
1 package ground beef
1 small can tomato paste
1/2 medium onion, diced
1/2 green bell pepper, diced
4 cloves garlic, minced
Several dashes of Worcestershire sauce
salt and pepper to taste
1 cup shredded cheddar cheese


Step One: Preheat the oven to 375 degrees. Pop open Crescent Rolls and lay out over a 9-inch pie pan in order to make a crust.


Step Two: Over medium heat, brown ground beef. When the beef has cooked, add in the tomato paste, Worcestershire sauce, salt, pepper, garlic, and onion, and cook for one minute longer. Remove from heat, and add the bell pepper.


Step Three: Dump ingredients into prepared "pie shell". Even out with spoon. Top entire pie generously with shredded cheddar cheese, and pop into the oven. Bake for 30 minutes, and let cool for 10 minutes before serving.


Scenario B:
Red Quinoa Salad with Mango and Curried Yogurt


Sometimes I just take one look at a recipe's ingredients list and decide two things: 1) there's absolutely no way all those flavors will go together, and 2) there's absolutely no way I'm going one more minute without trying it for myself. Thus, when the med student couldn't pry his eyes away from the text book for some dinner, I chose to give this one a whirl. I made several revisions to the original recipe, and, after 20 minutes of easy effort, I found myself sitting down to a bowl of this absolutely delectable, complicated, and surprisingly delicious grain salad. If you're in the mood for something light on the tummy but challenging to the palate, this may very well be the dinner for you.


Ingredients:
1/3 cup plain yogurt
1 tablespoon fresh lime juice + 1/4 teaspoon zest
2 teaspoons curry powder
1 teaspoon finely grated peeled fresh ginger
1/2 teaspoon salt
1/4 teaspoon black pepper
1 tablespoon vegetable or peanut oil
1 1/3 cups uncooked quinoa - I used red, but any color would do just fine
1 pound firm-ripe mango, peeled, pitted, and cut into 1/2-inch chunks (2 cups)
1 red bell pepper, cut into 1/4-inch dice
1 fresh jalapeƱo chile, seeded (if desired for less heat) and minced
1/3 cup chopped fresh mint
1/2 cup salted roasted peanuts (2 1/2 ounces), chopped

Step One: Prepare your quinoa according to the instructions on the package. For me, that mean rinsing the quinoa with water before putting it in a saucepan with 3 cups water. Then I brought the water to a boil, covered the pan, reduced the heat and let it simmer until the water had evaporated (about 15 minutes). The done quinoa should have loose little tales, and be chewy with a tiny bit of crunch. You don't want soggy grains here.

Step Two: Make the sauce. Whisk together the yogurt, lime, zest, curry, ginger, salt, pepper, and oil until thoroughly blended.


Step Three: Mix it all up. Add the prepared bell pepper, jalapeno, mint and peanuts to the quinoa and pour the yogurt mixture on top, before stirring to coat evenly. Garnish with a sprinkling of chopped peanuts and a mint leaf. Enjoy!
-Adriana
 

Subscribe in a reader

Adriana Willsie and Kylie Springman ©2009